How To Make A Minecraft Server
This blog will show you the ultimate guide on how to create a Minecraft server, such as installation, and how to set up different versions including Vanilla, Spigot, and Paper.

Introduction
The popularity of Minecraft has soared over the years, captivating millions of players around the globe with its creative possibilities and immersive gameplay. As you delve deeper into this virtual world, you may find yourself wanting to create your own Minecraft server—a place where you and your friends can build, explore, and embark on epic adventures together.
In this ultimate guide, we will walk you through the process of setting up and hosting a Minecraft server. Whether you’re an experienced server owner or a curious beginner, we’ve got you covered. From the initial steps of creating your server to the intricacies of server administration and customization, we will provide step-by-step instructions and valuable insights. By the end of this article, you’ll have all the knowledge you need to confidently embark on your Minecraft server journey.
Choosing Your Minecraft Server Type
Minecraft servers come in various forms, each with its own unique features and functionalities. From vanilla servers that provide the authentic Minecraft experience to modded servers that introduce new gameplay elements, there’s a wide array of server types to choose from. Understanding the distinctions between server types, such as Spigot, Forge, and more, will help you determine which one aligns with your vision.
If you’re planning to have a new and complete Minecraft experience on your server, it’s essential to explore the different server types available. Vanilla servers offer the pure and unaltered Minecraft gameplay, allowing you to play the game as it was originally designed. On the other hand, if you’re seeking to change up your gameplay with additional features, modded servers are the way to go. These servers enable you to install mods that introduce new gameplay mechanics, items, and even entire dimensions, providing a fresh and exciting twist to your Minecraft adventures.
If neither of those option suit you, Spigot might be the best choice for you! While keeping an authentic feel to your server. Hosting your server using a Spigot server enables you to keep Vanilla players interested while attracting new players which search for a more altered experience.
Setting Up Your Server
Once you’ve determined the type of Minecraft server that aligns with your vision, it’s time to dive into the exciting process of setting it up. This section will guide you through the essential steps required to create and configure your Minecraft server, turning your virtual dream into a reality.
Why Should I Pick RocketNode to Host my Rust server?
- 99.9% Uptime guarantee
- Unlimited bandwidth with high-speed connections for a seamless experience for your players
- Industry-grade server equipment ready for your server’s needs
- DDoS (Distributed Denial-of-Service) attacks prevention and mitigation using our own RocketGuard service
- 24/7 Support ready to help you on your journey
Let’s Get Started
After determining which type of server you wish to install on your server, you will have multiple options from here. If you’re planning to have a server made for a public, putting in hours and hours of work to provide the best experience for your players is to be expected. However, if you’re looking for a fun experience with your friends our Rocketnode Panel provides a lot of features to make this process as easy as possible.
Installing Your Favored Server Type
Moving forward, after the purchase of your server, getting your server online is as easy as just pressing a button to start your server. Our Panel offers very easy installation methods for every
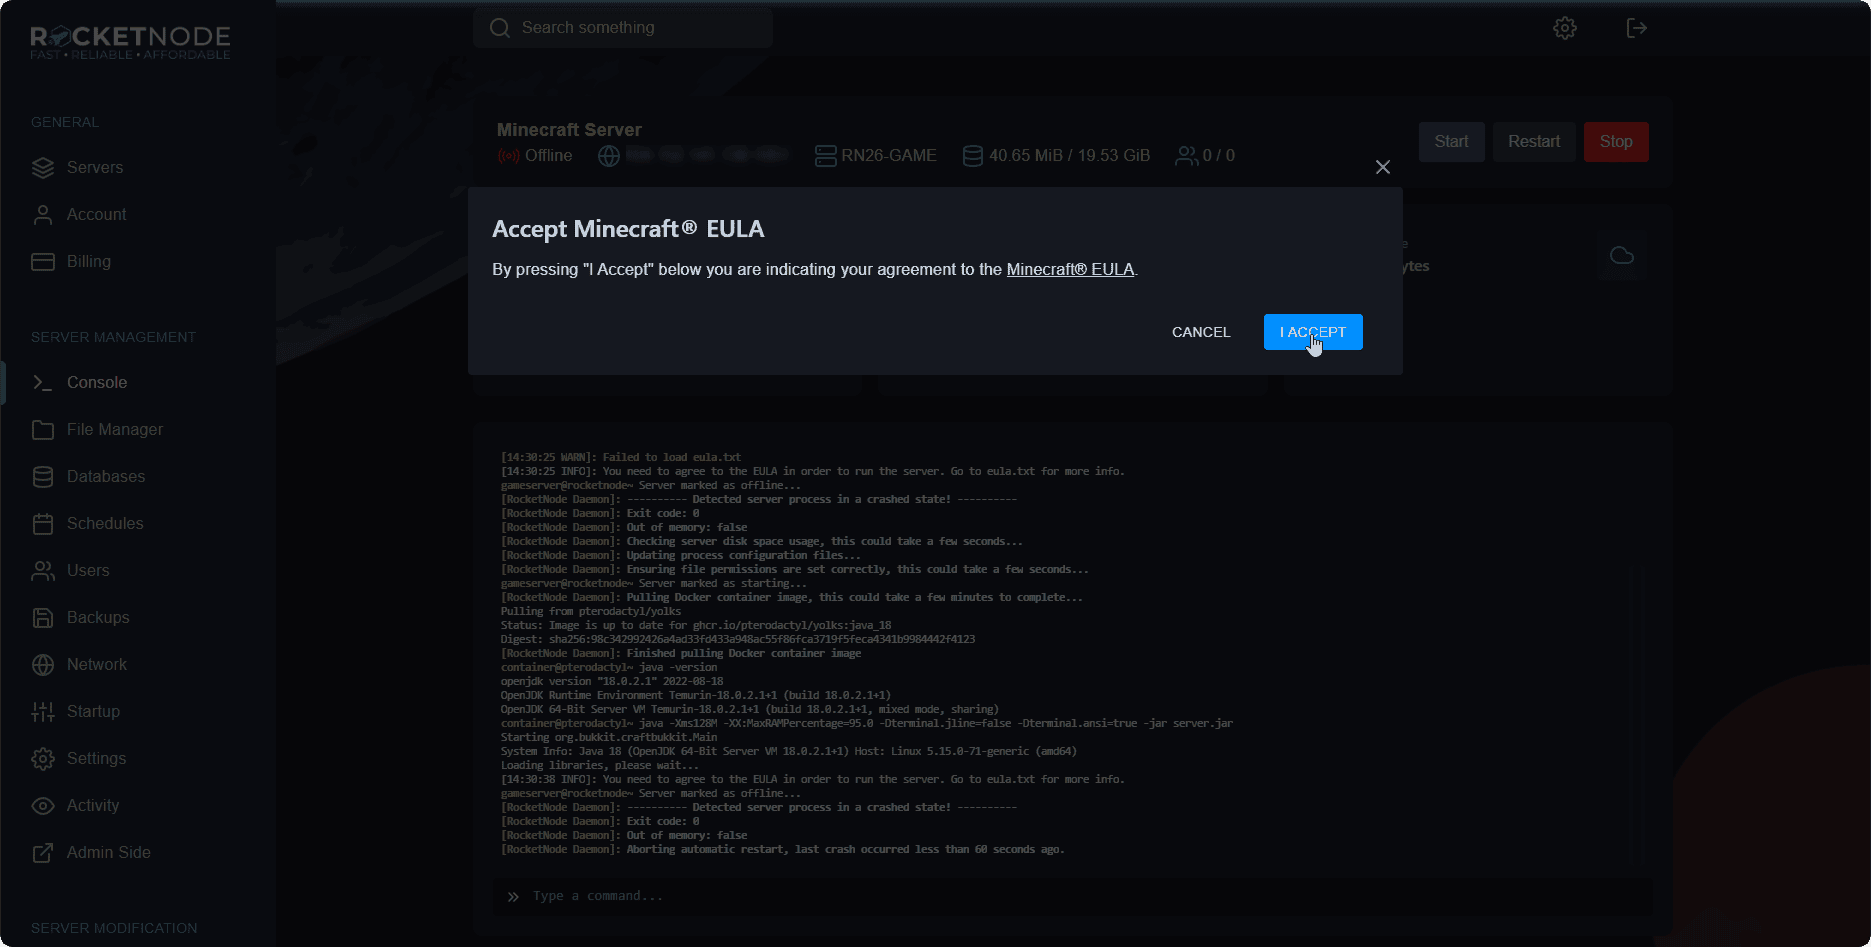
Vanilla
You will have a default installation of a Minecraft server (a vanilla server) for you ready to play on. Upon clicking START on your server the following prompt will appear. You’ll have to click I ACCEPT in order for the server to be ready. This prompt will appear every time that you install a new server type.
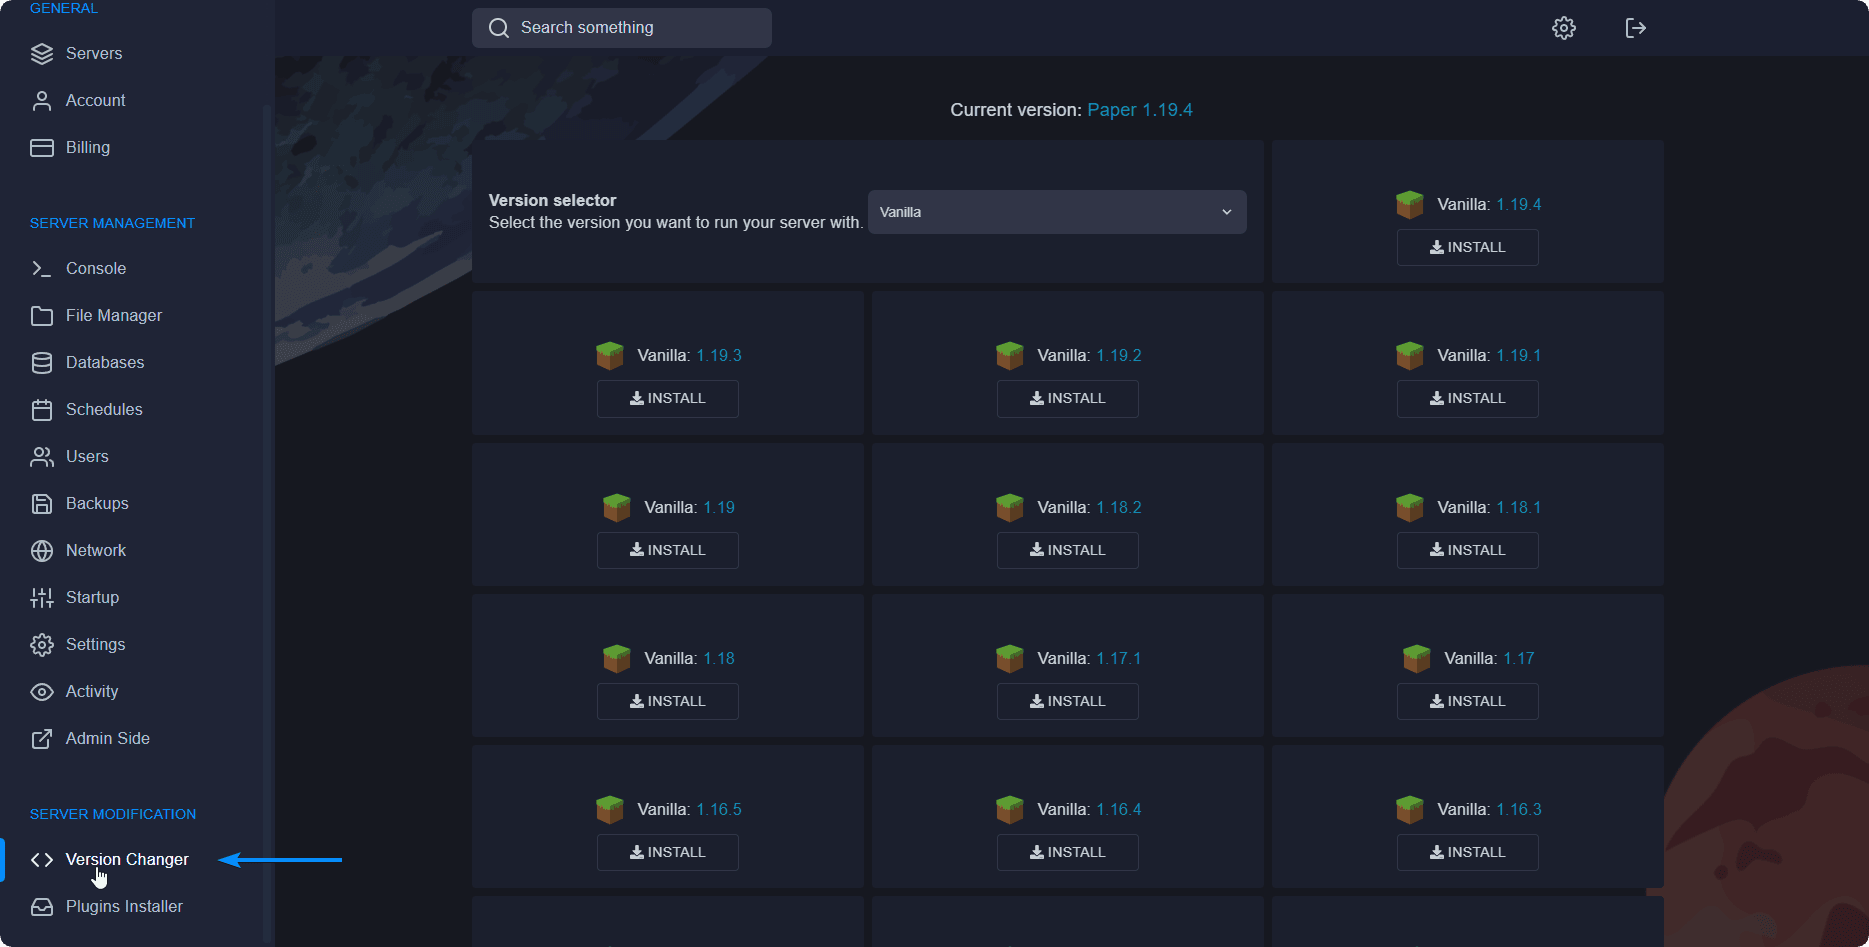
Introducing Our Version Changer
With our innovative version changer, you can now effortlessly switch between different Minecraft versions with just a simple click of a button. Say goodbye to the hassle of manual installations or searching for specific game files to experience a different version of Minecraft.
- Navigate over to your server in your Servers tab.
- Click on “Version Changer”.
- Select your desired type of server from the dropdown.
- Click on the INSTALL button for the version needed.
If you’d like to see a detailed guide on how to use and install your favorite version of Minecraft you can take a look on our following articles:
- Spigot — How to install a Spigot server
- Forge — How to install a Forge server
- Paper — How to install a Paper server (recommended replacement of Spigot)
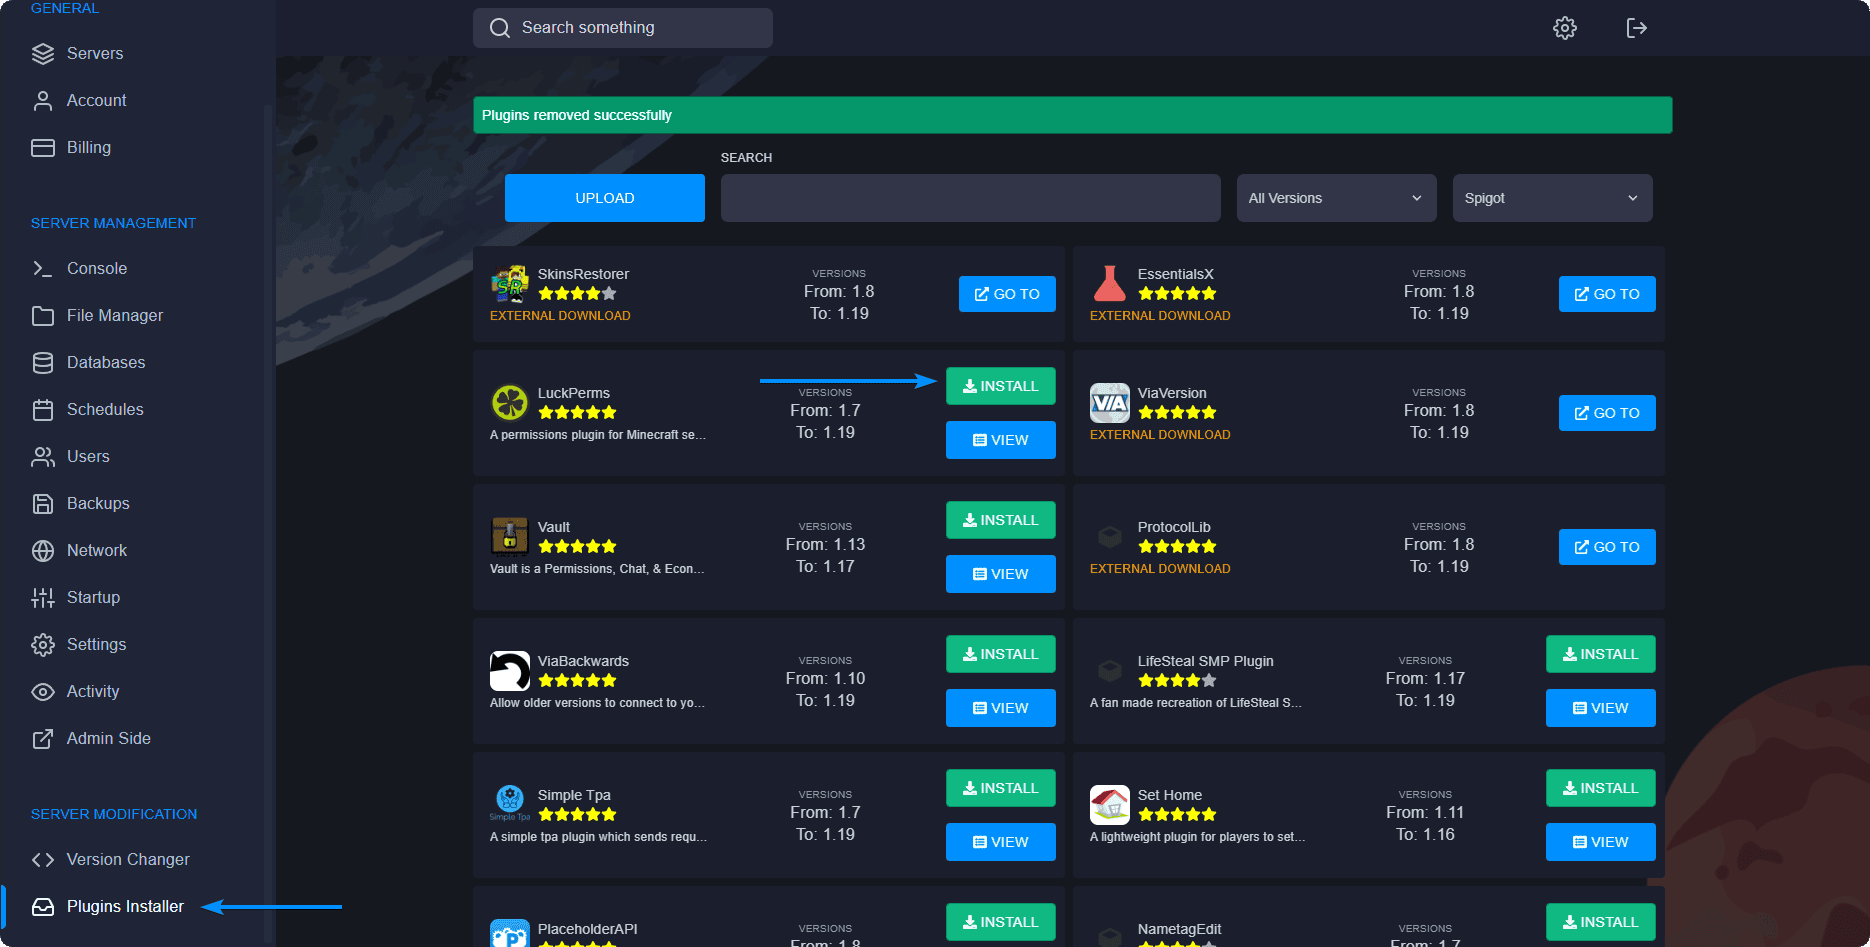
Installing your first plugin
Installing plugins has never been easier thanks to our plugin installer, which eliminates the need of having to navigate over to Spigot’s plugin page in order to install t
hem. You can still install custom plugins on your server by manually dropping them into the plugins folder if you do not wish to use our installer.
- Navigate over to your server in your Servers tab.
- Click on “Plugins Installer”.
- Search for the plugin you wish to install.
- Click on the INSTALL button next to the plugin needed.
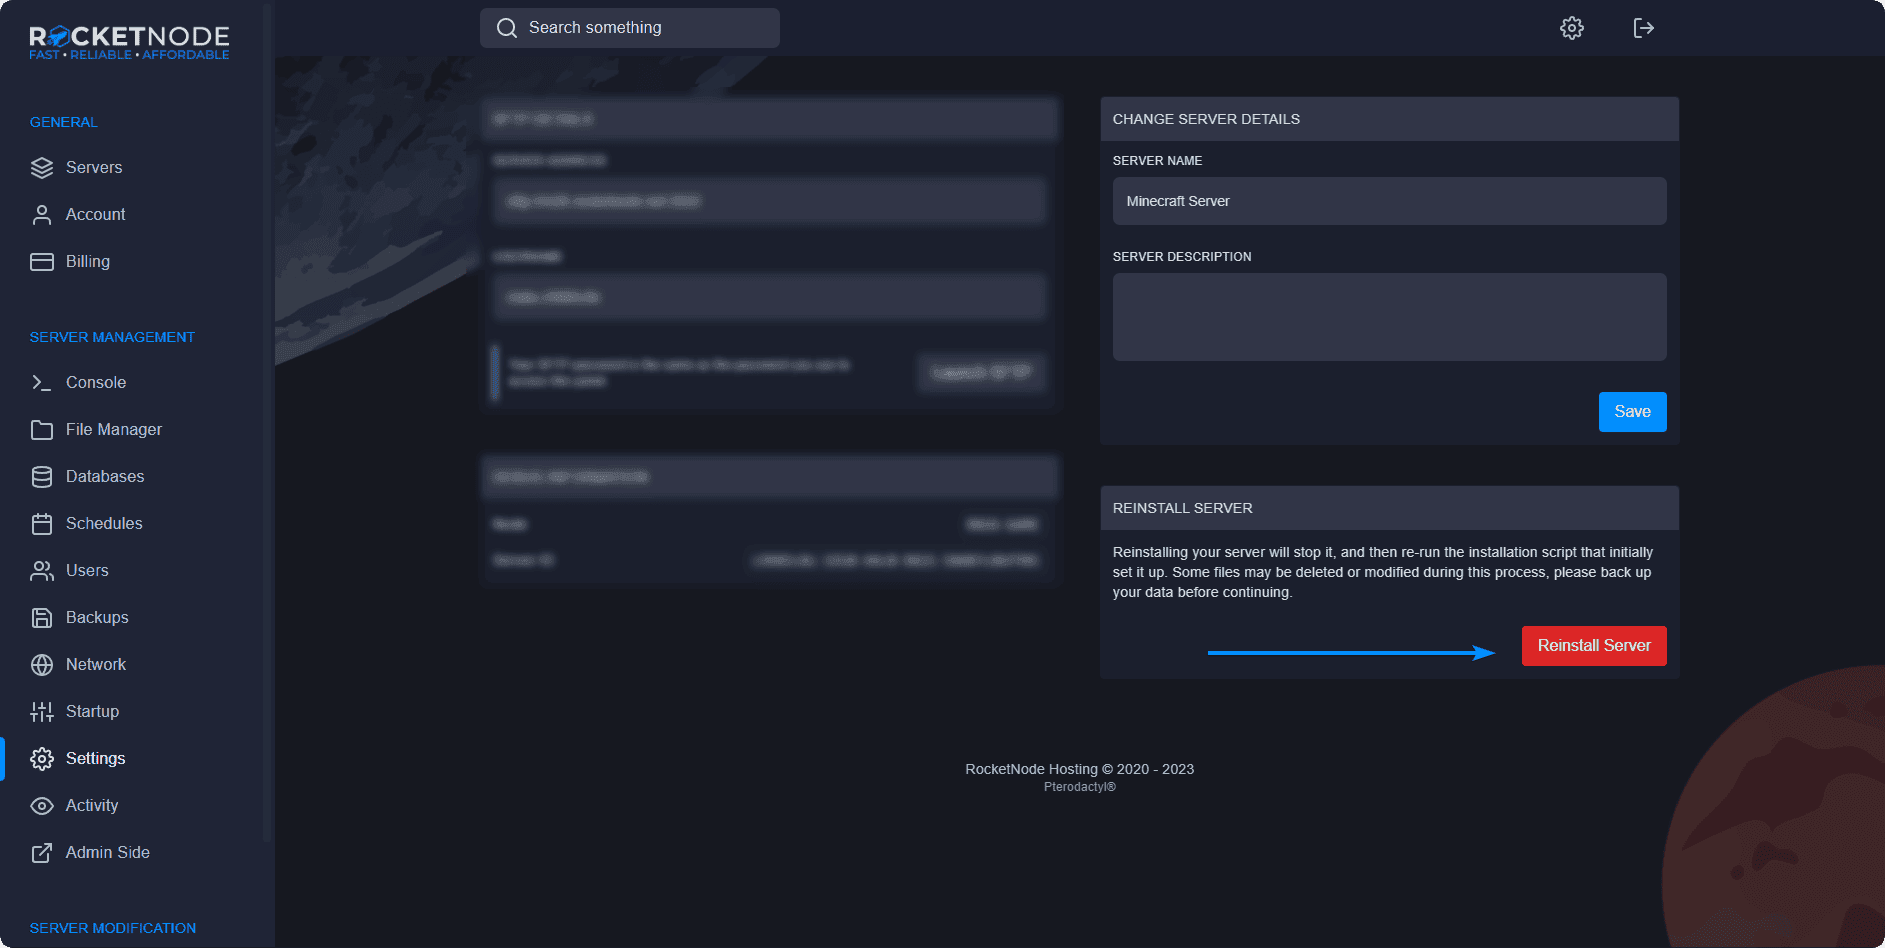
Reinstall Server
Reinstalling your server might be necessary at any point if you need a fresh start on your files or simply something isn’t working, however, be careful as this setting can remove your files and you might lose the progress made on your server.
- Head over to the RocketNode Panel.
- Open the Server Settings link of the Panel.
- Press the Reinstall Server button.
- Press the Yes, reinstall server button once you are sure you would like to continue.
- Your server will now reinstall to its original state.
Creating Server Backups
Data backups are essentially duplicates of important files or information that are stored in a separate location from the original data. By creating and regularly updating backups, you can ensure that in the event of a disaster, you will still have access to your important files and data.
Creating a backup is simple:
- Head over to the RocketNode Panel.
- Open the Backups section of the Panel.
- Press the Create Backup button.
- Give the backup a name usually marking the date you’ve made it so you can figure out what backup to use in case something bad happens.
- You can leave the Ignored Files & Directories blank unless there is a file you don’t want to include in the backup.
- You can select the Locked option, to prevent accidental deletion of your backup.
- Press the Start Backup button.
Creating a Minecraft server is an exciting and rewarding experience that allows you to build a community, explore endless possibilities, and share your creations with others. By following the step-by-step guide provided in this article, you can establish a server that meets your needs and preferences.
your hosting partner
RocketNode offers fast and affordable game and VPS hosting solutions on reliable and efficient hardware with AMD Epyc architecture and NVME storage to assure high performance.
See games & pricing