
How To Change Your Palworld Server Name And Connect To Your Server
This article will provide a step-by-step instructions on how to connect to your Palworld server.
Introduction
Palworld is still in Early Access, so some features such as the in-game server listing are not always reliable. The community server browser often has issues with only showing a limited number of servers per page. If your world does not appear, the best method is to connect directly using the server IP or invite code. Services like BattleMetrics are useful to confirm if your server is online, but they should be treated as a secondary check.
Step 1: Access the RocketNode Hosting Panel
Log in to your RocketNode dashboard and select the server you want to configure. Before you continue, make sure it’s turned OFF. From the top navigation, click Configuration to access your server settings.

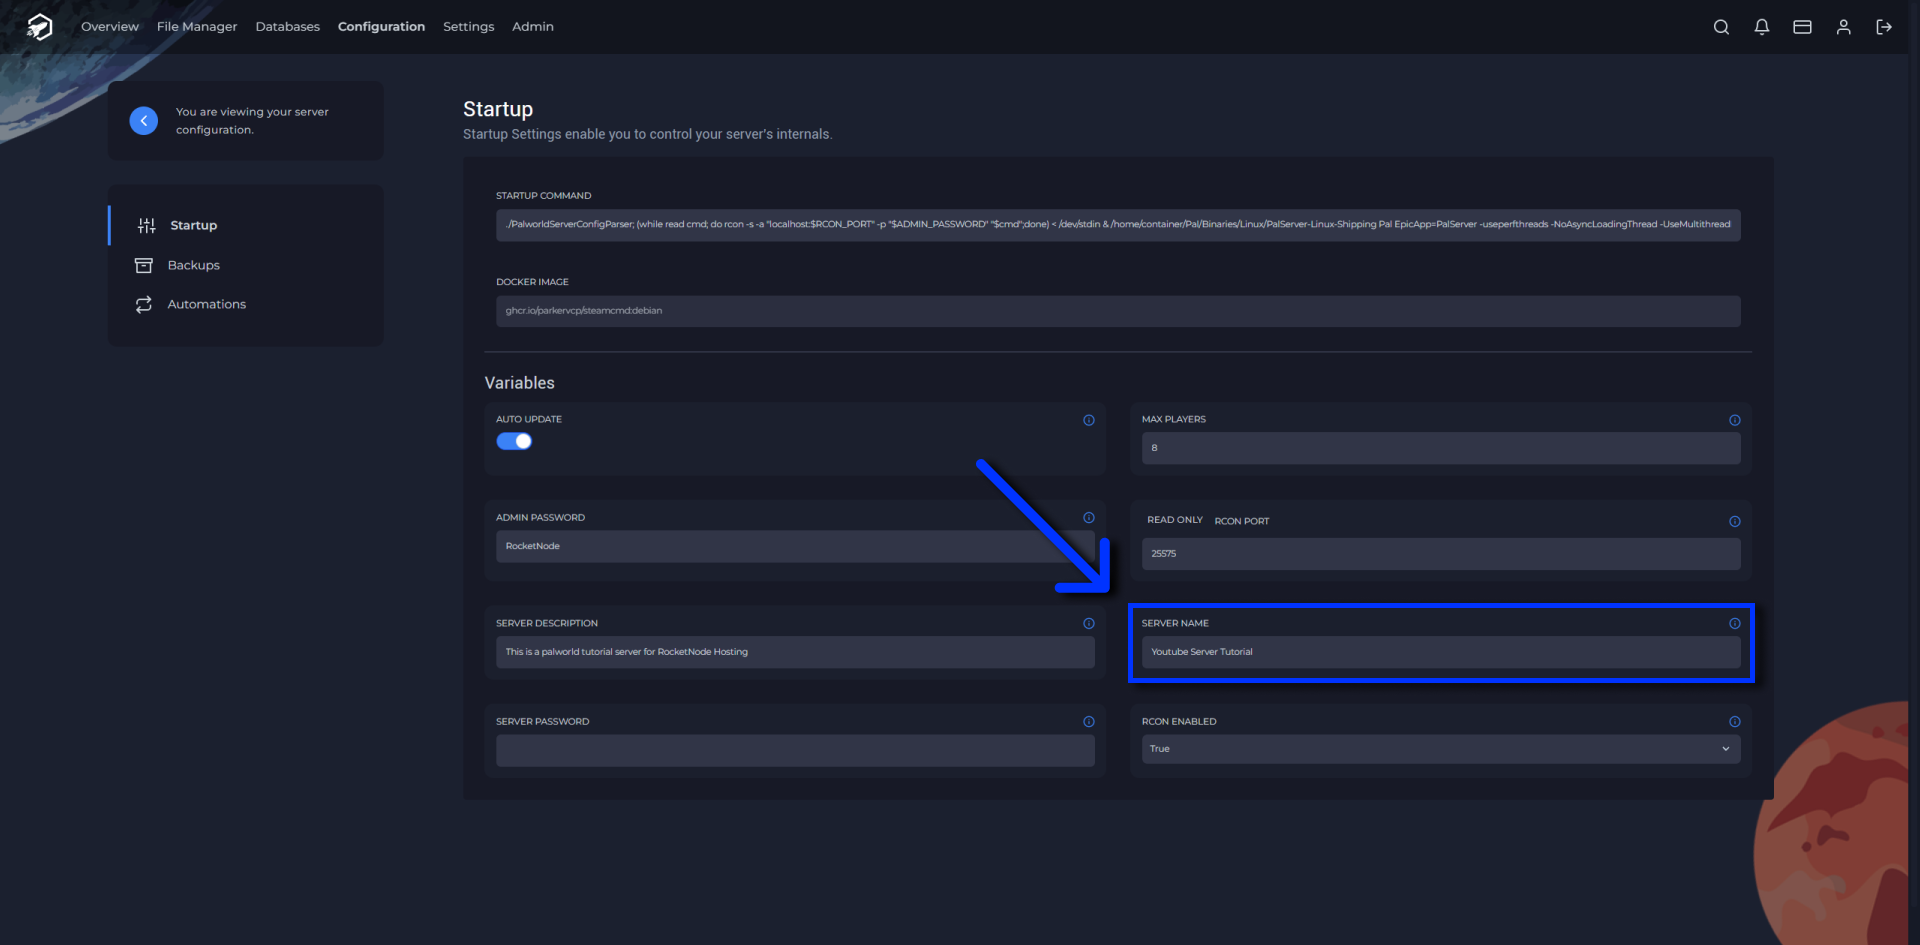
Step 2: Rename Your Server
Look for the Server Name field. Enter your new server name and save. This will update the server settings and apply the change the next time the server is restarted.
Step 3: Apply Changes
Go back to the Overview tab. Use the Start button to turn on the server with the updated name.
Step 4: Locate Your IP Address
From the Overview tab, find the server’s IP address and port. Click on the address, as it will automatically copy.

Step 5: Launch Palworld and Join
Open Palworld on Steam and go to Join Multiplayer Game. You have two options:
- Search for your server name in the community server list.
- Use Direct Connect by pasting the IP address and clicking Connect.
The second option is more reliable, since the server list often fails to display all active servers.
Troubleshooting Tips
- Server name does not update: If your server still shows the default name, check that the
PalWorldSettings.inifile is updated in the correct directory (Pal/Saved/Config/LinuxServer). - Server list issues: The community browser is still unstable. Direct connect is always the most dependable option.
Conclusion
Renaming and connecting to your Palworld server with RocketNode is quick and simple. Use the Configuration menu to update the server name, start it from the Overview page, and connect directly with the IP address if the server list does not display your world. This method ensures you and your friends can always join without waiting for the in-game browser to work correctly.
Find out more about Palworld server hosting with the help of our Knowledgebase articles that can be found here. For any questions please contact the support team via Discord or on-site Tickets.
