Helpdesk
2 minute read
How To Use Geyser
Installing the GeyserMC Plugin
-
Install the compatible GeyserMC version.
-
Access your RocketNode Panel.
-
Stop the server.
-
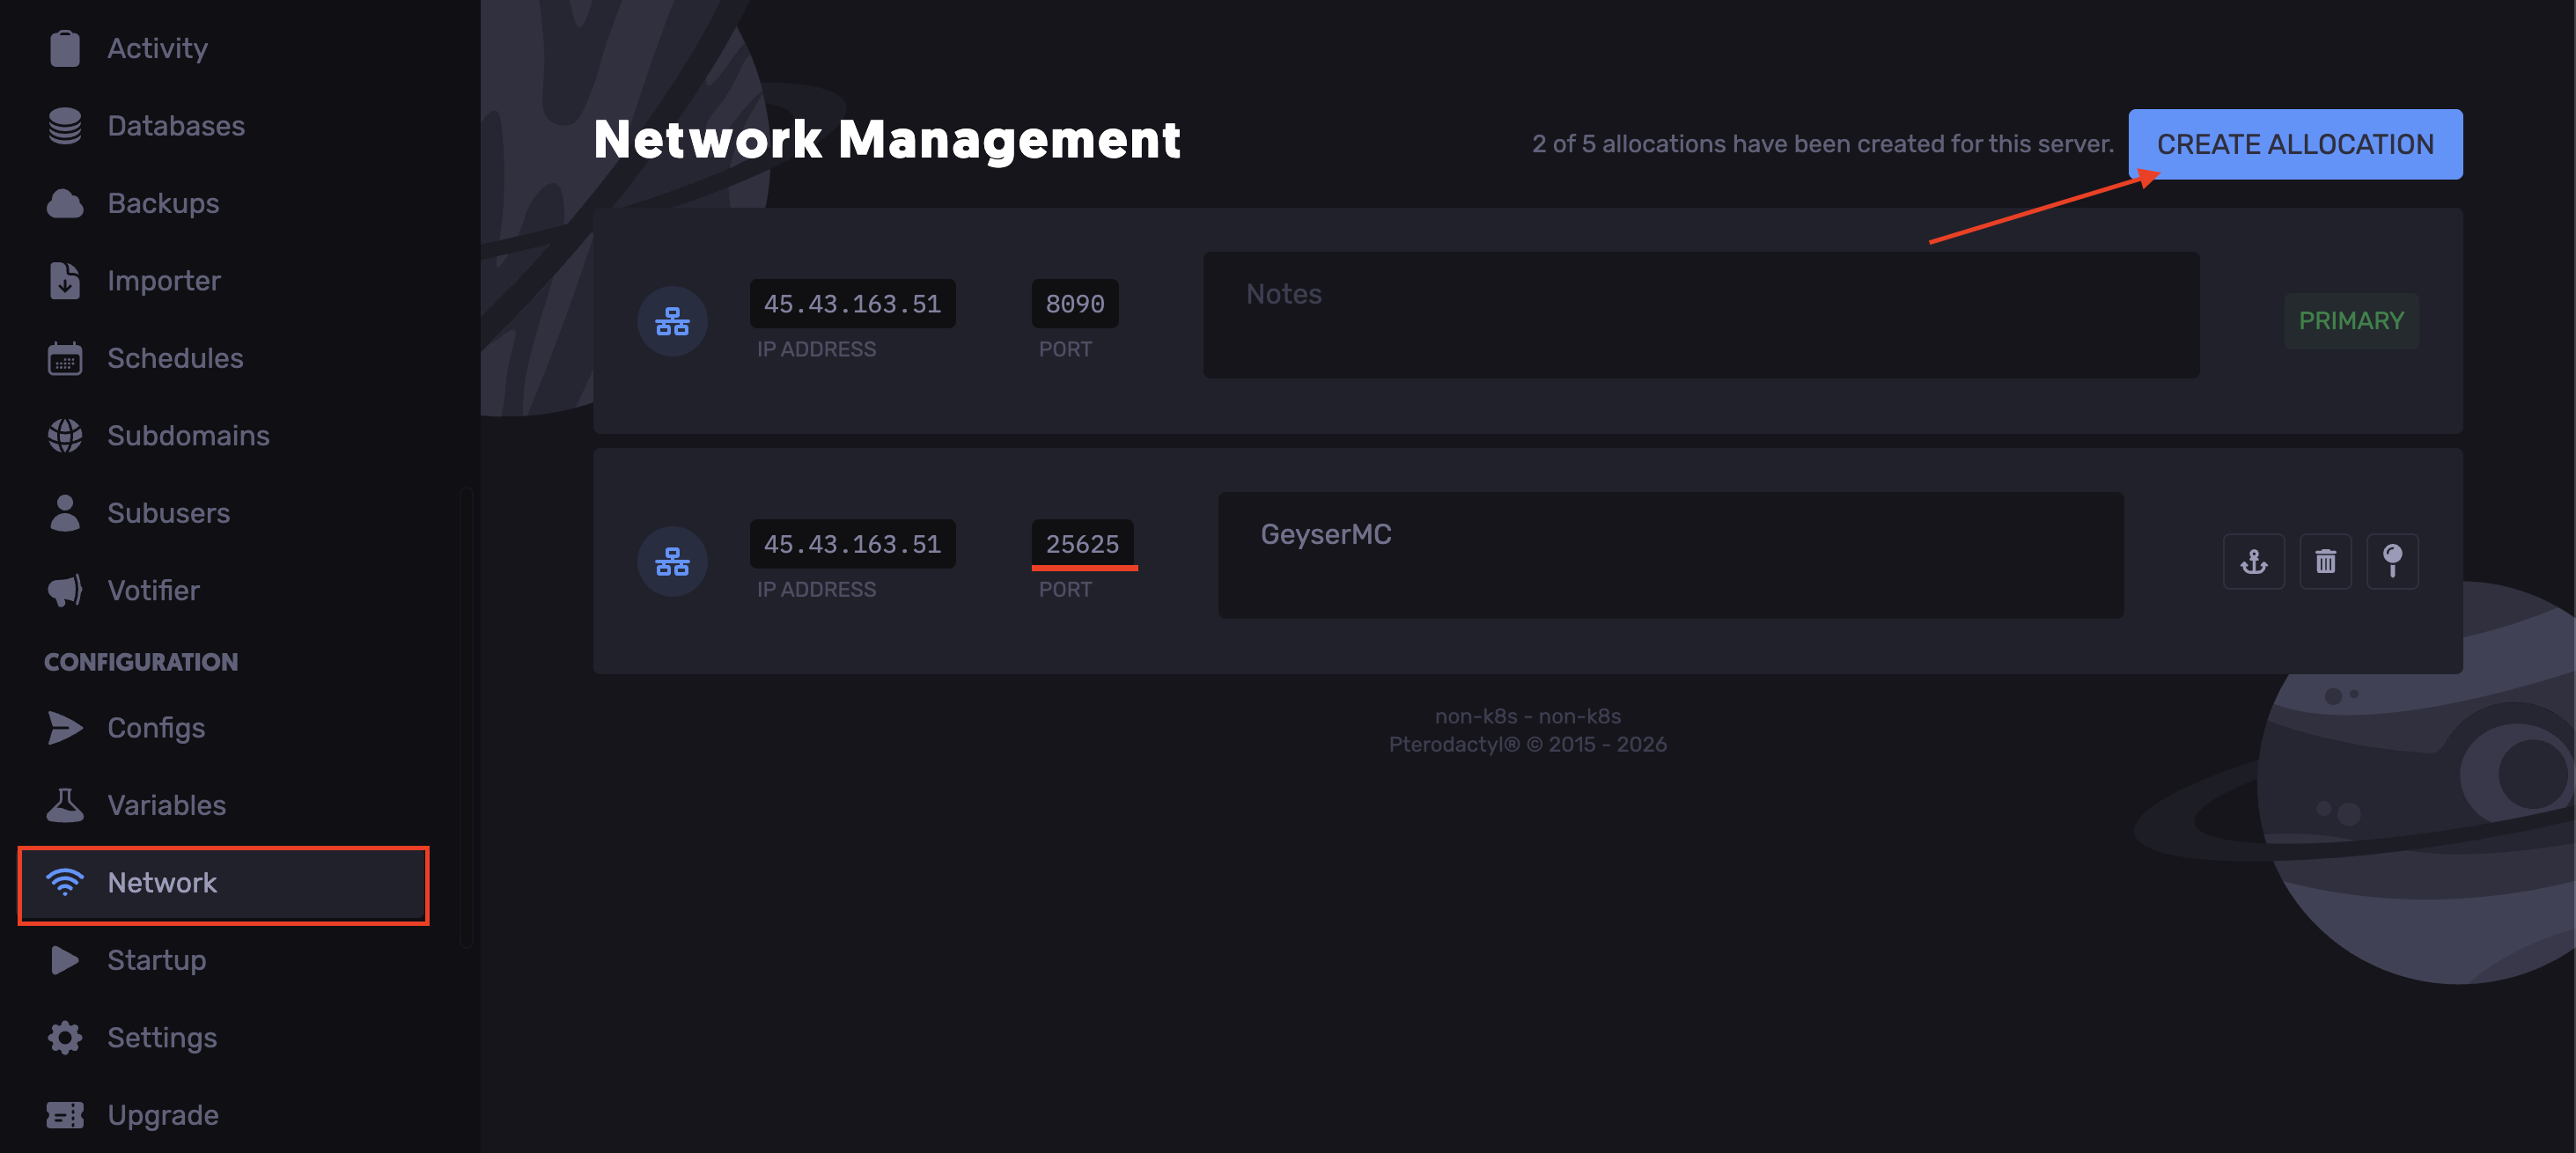
Head over to the Networks tab.
-
Click “Create Allocation” and copy the newly generated port.

-
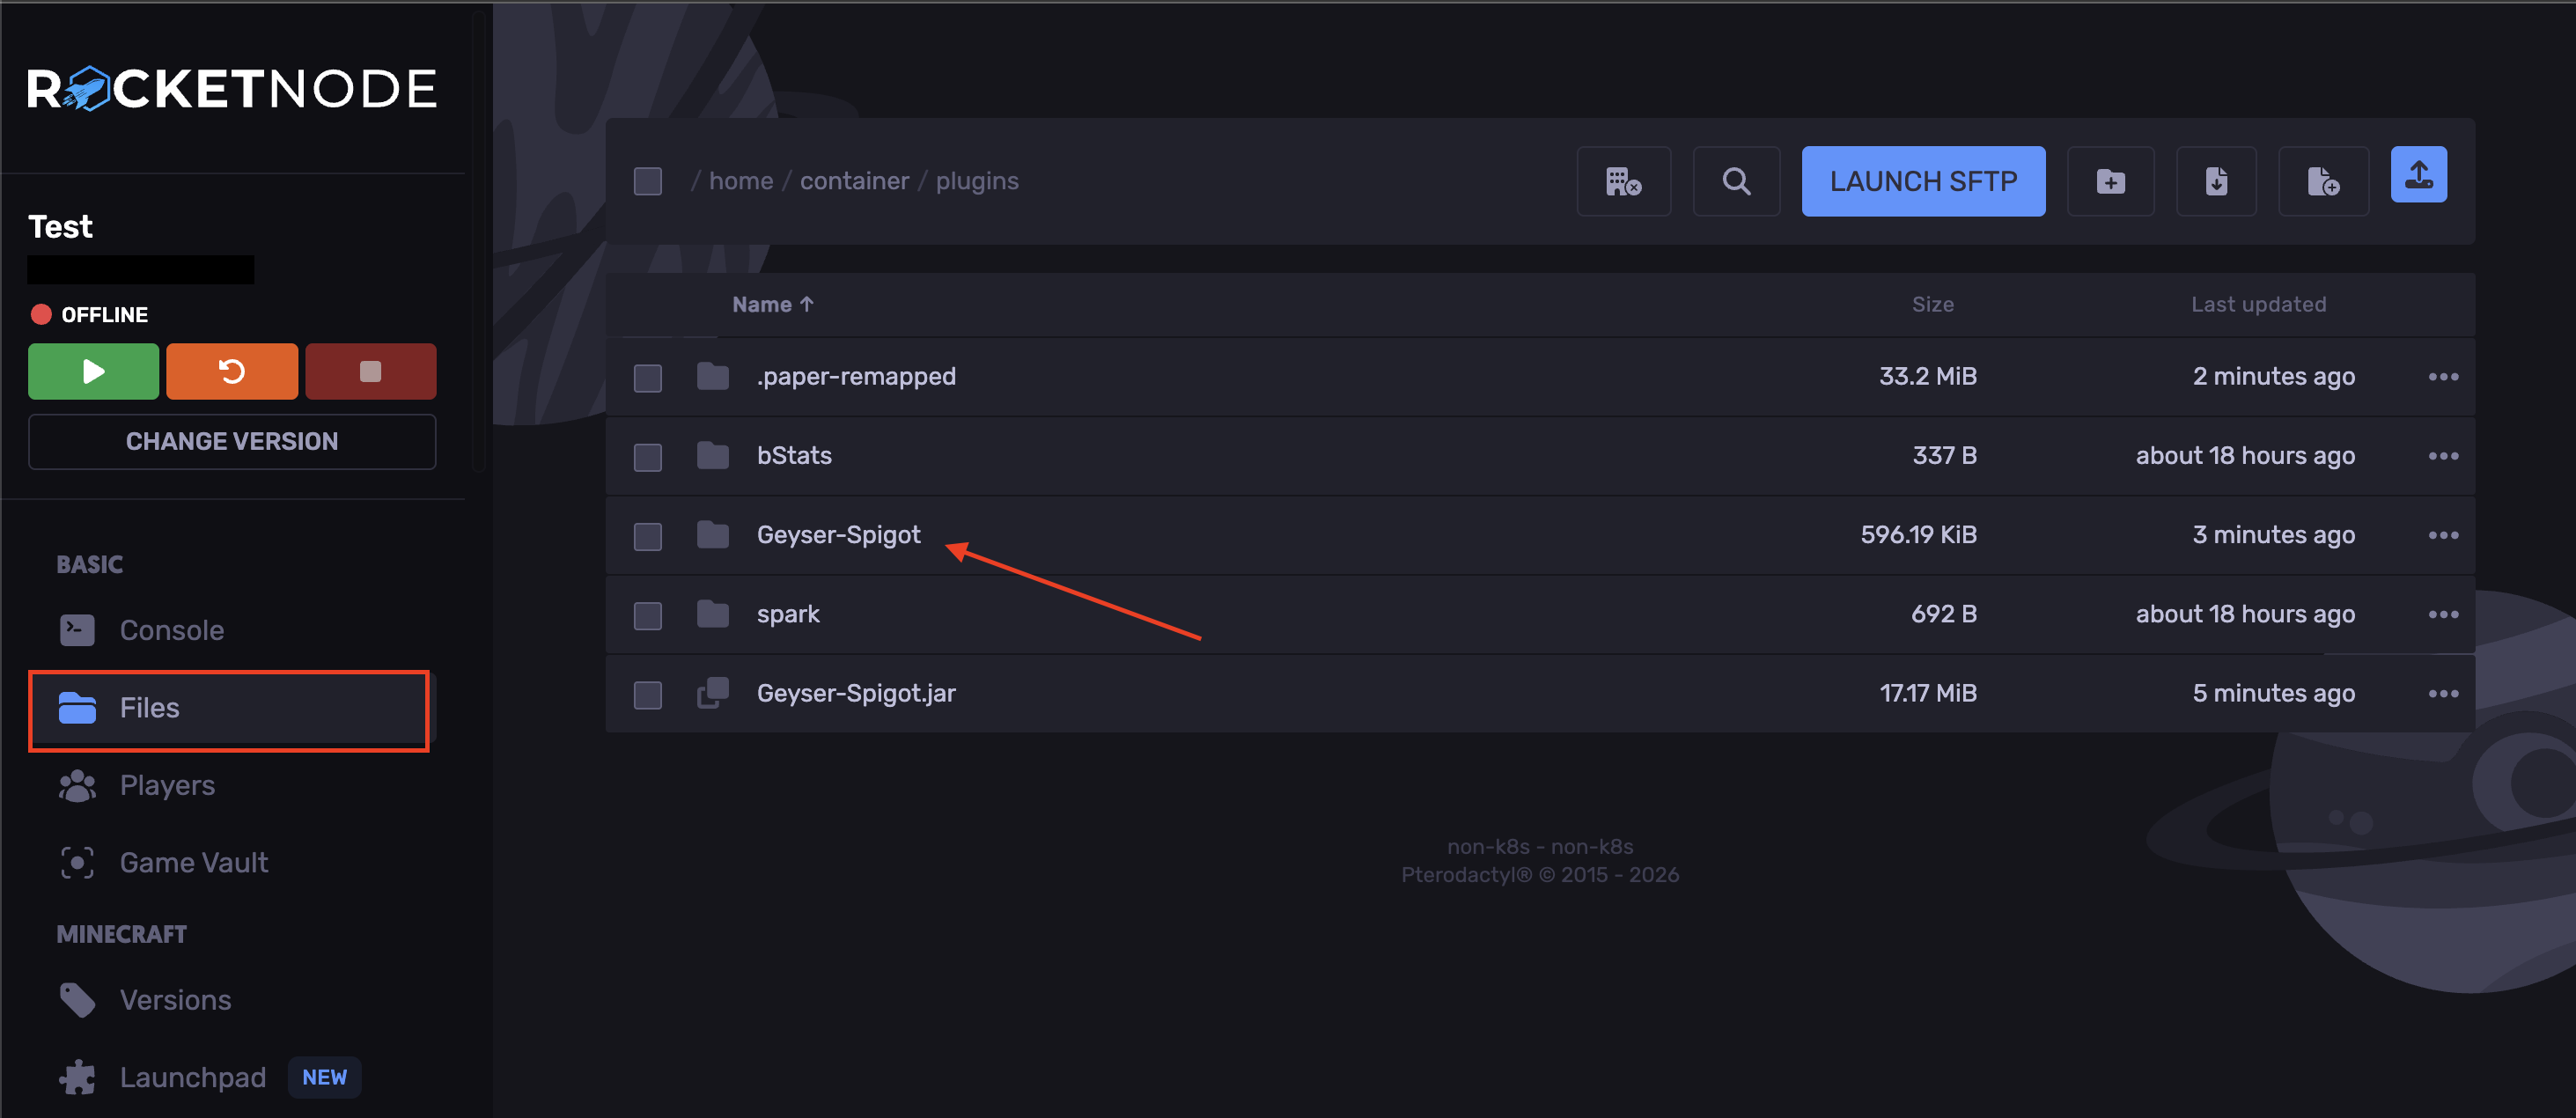
Navigate to the Files tab.
-
Upload the jar file to your `plugins` folder.
-
Start the server.
-
Stop the server.
-
Open the `plugins` folder and locate the `Geyser-Spigot` folder.
-
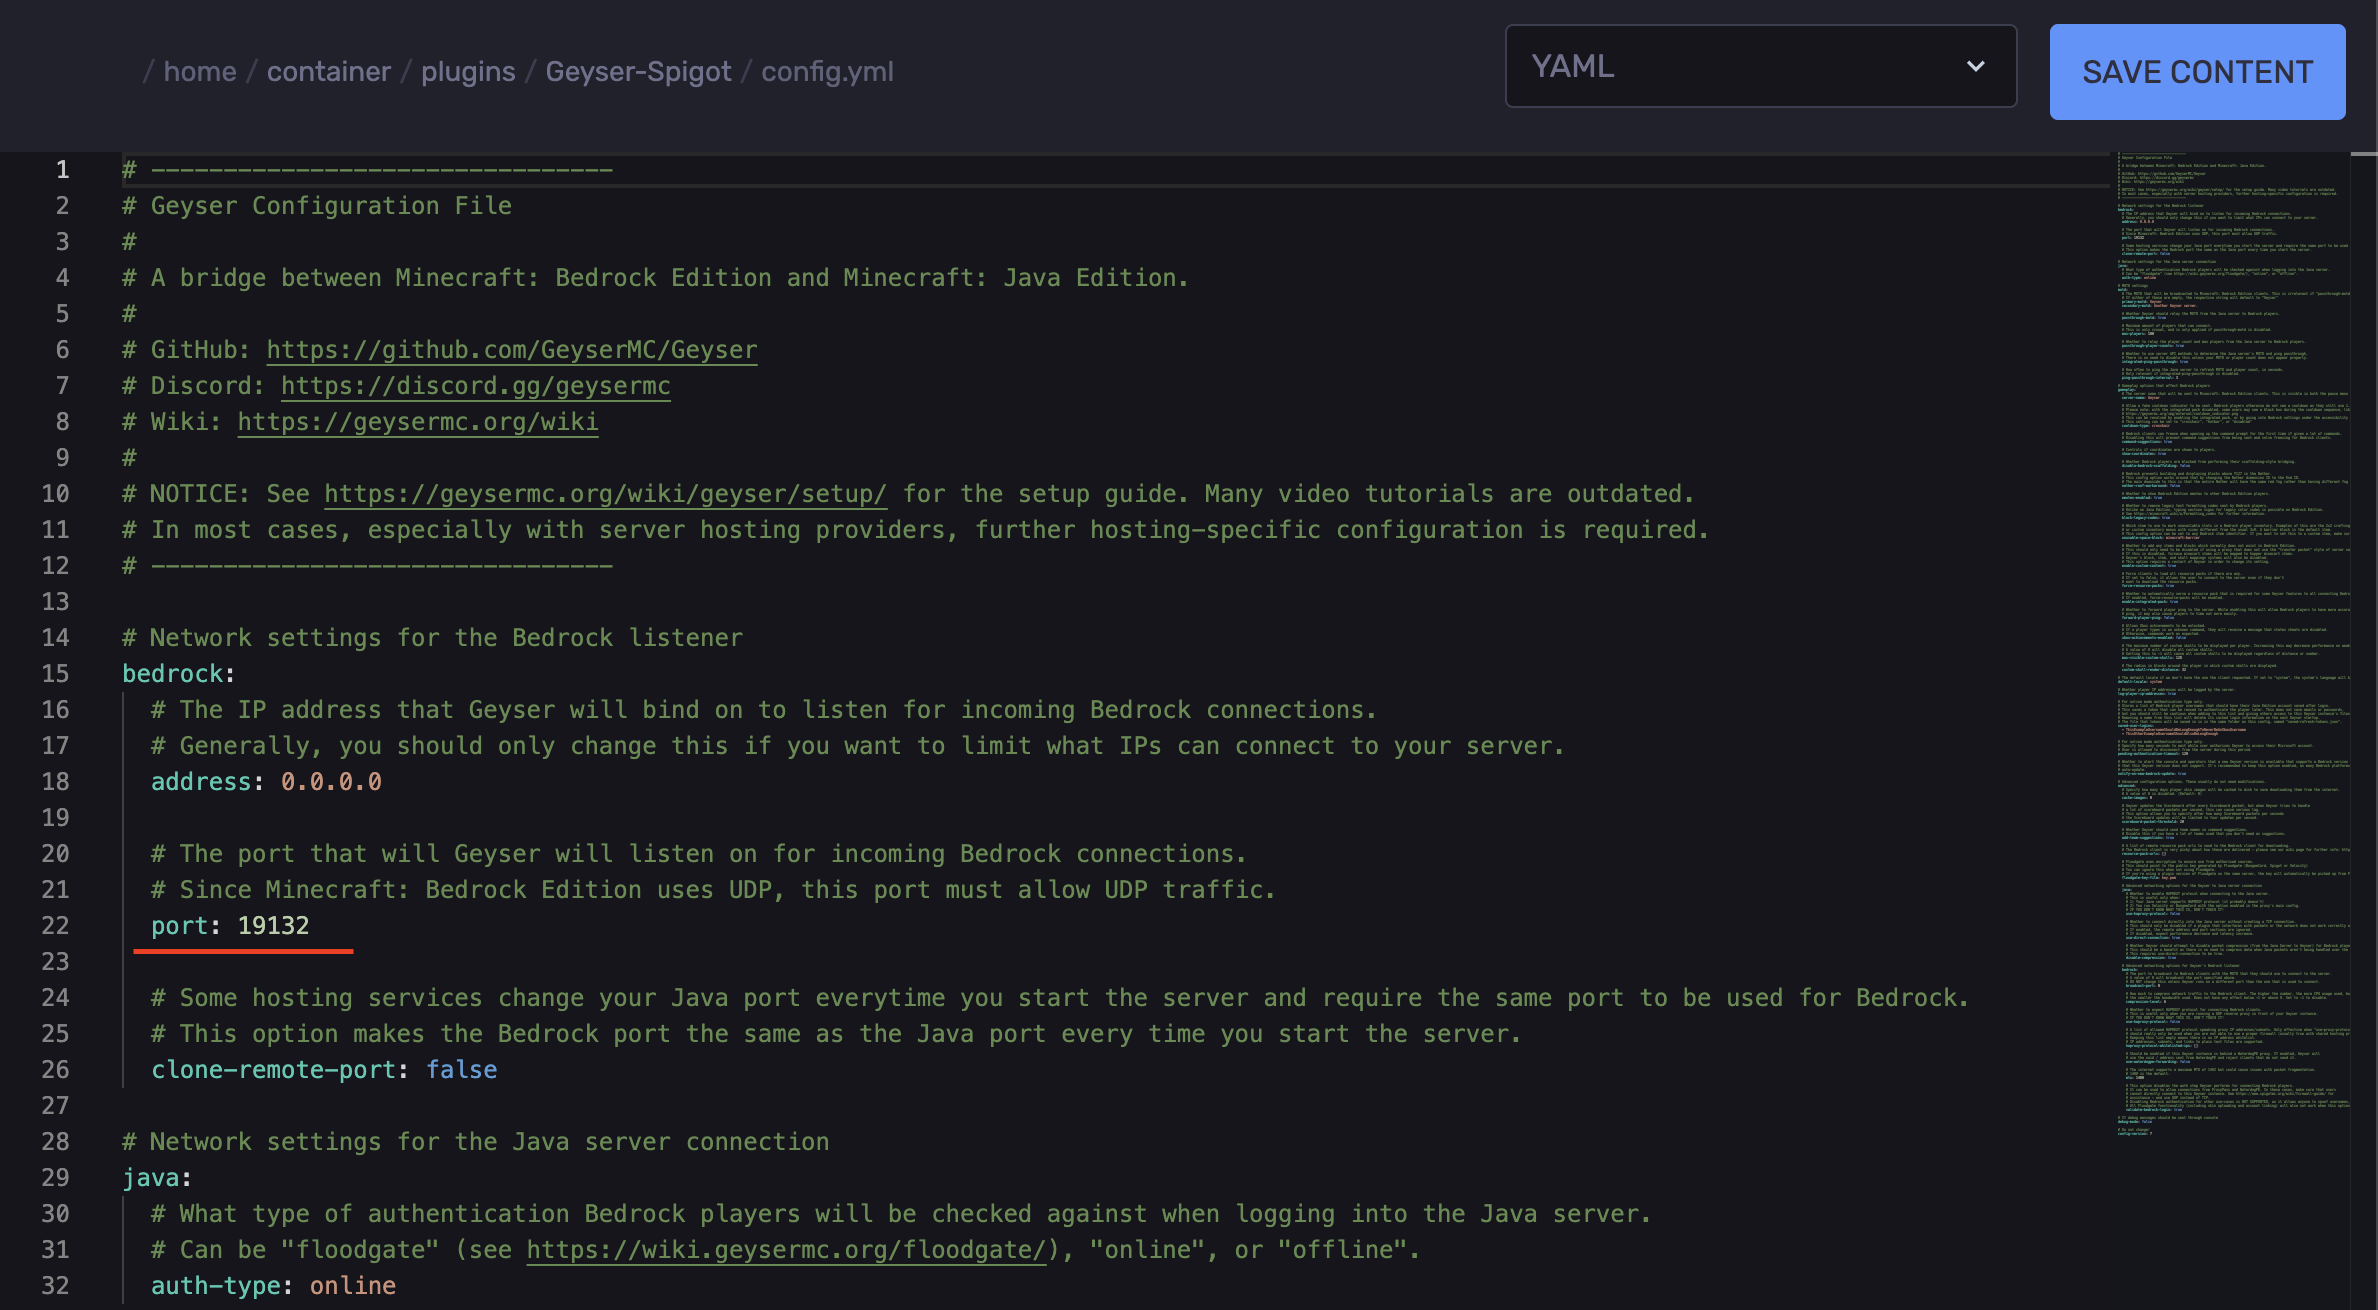
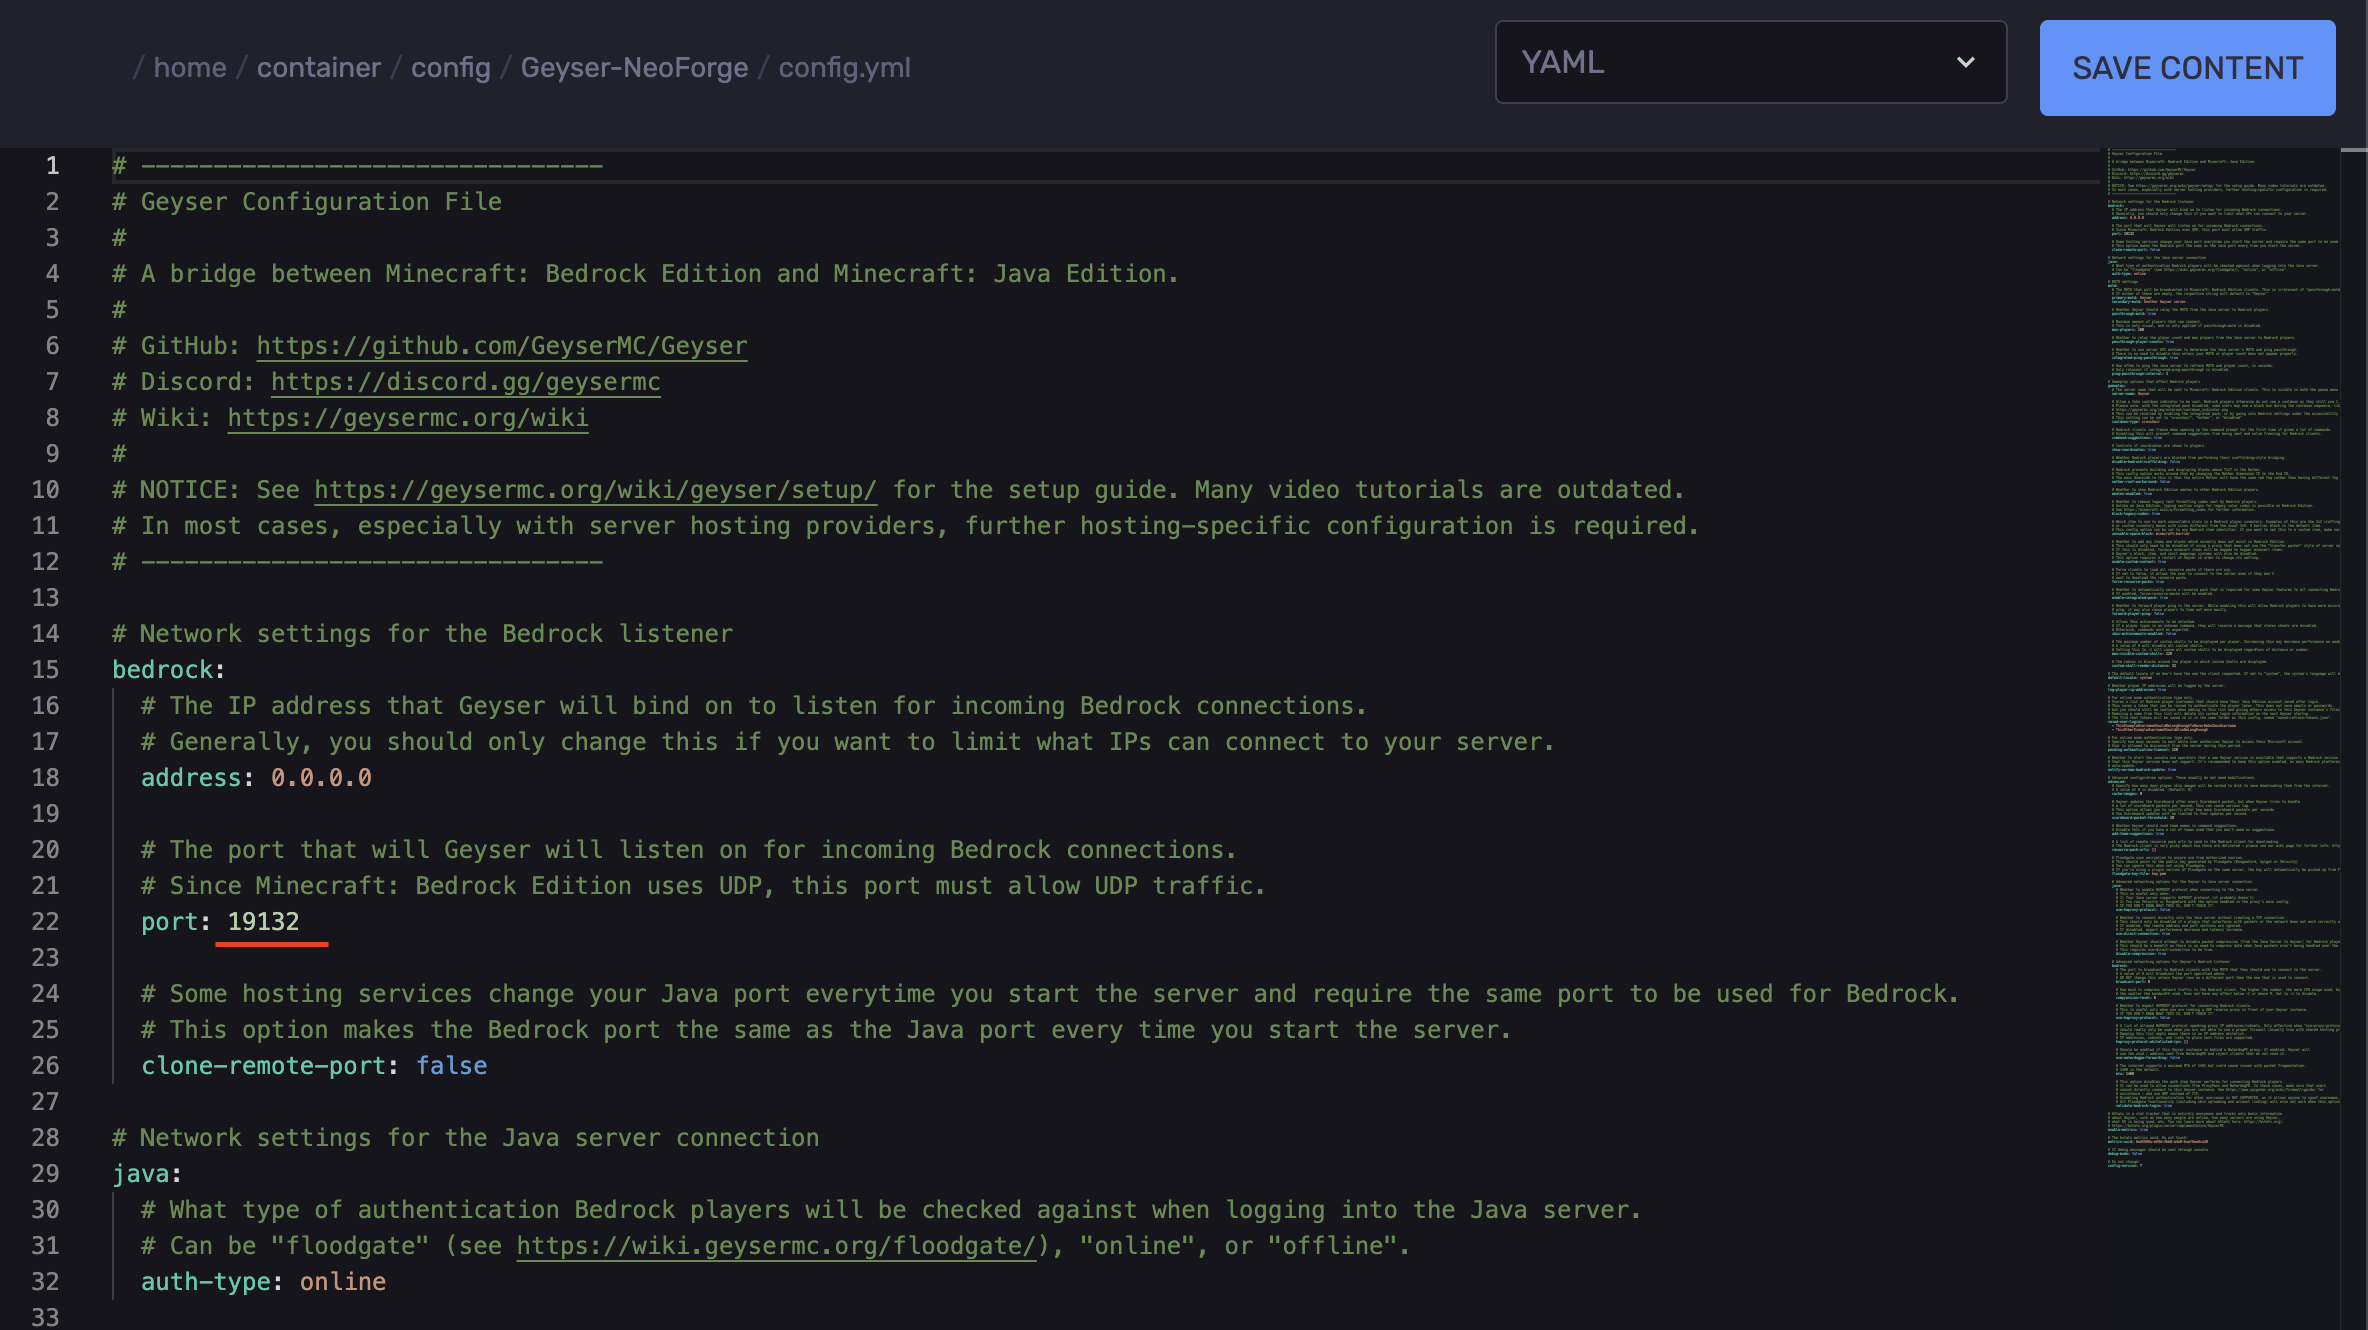
Click on the `config.yml` file.
-
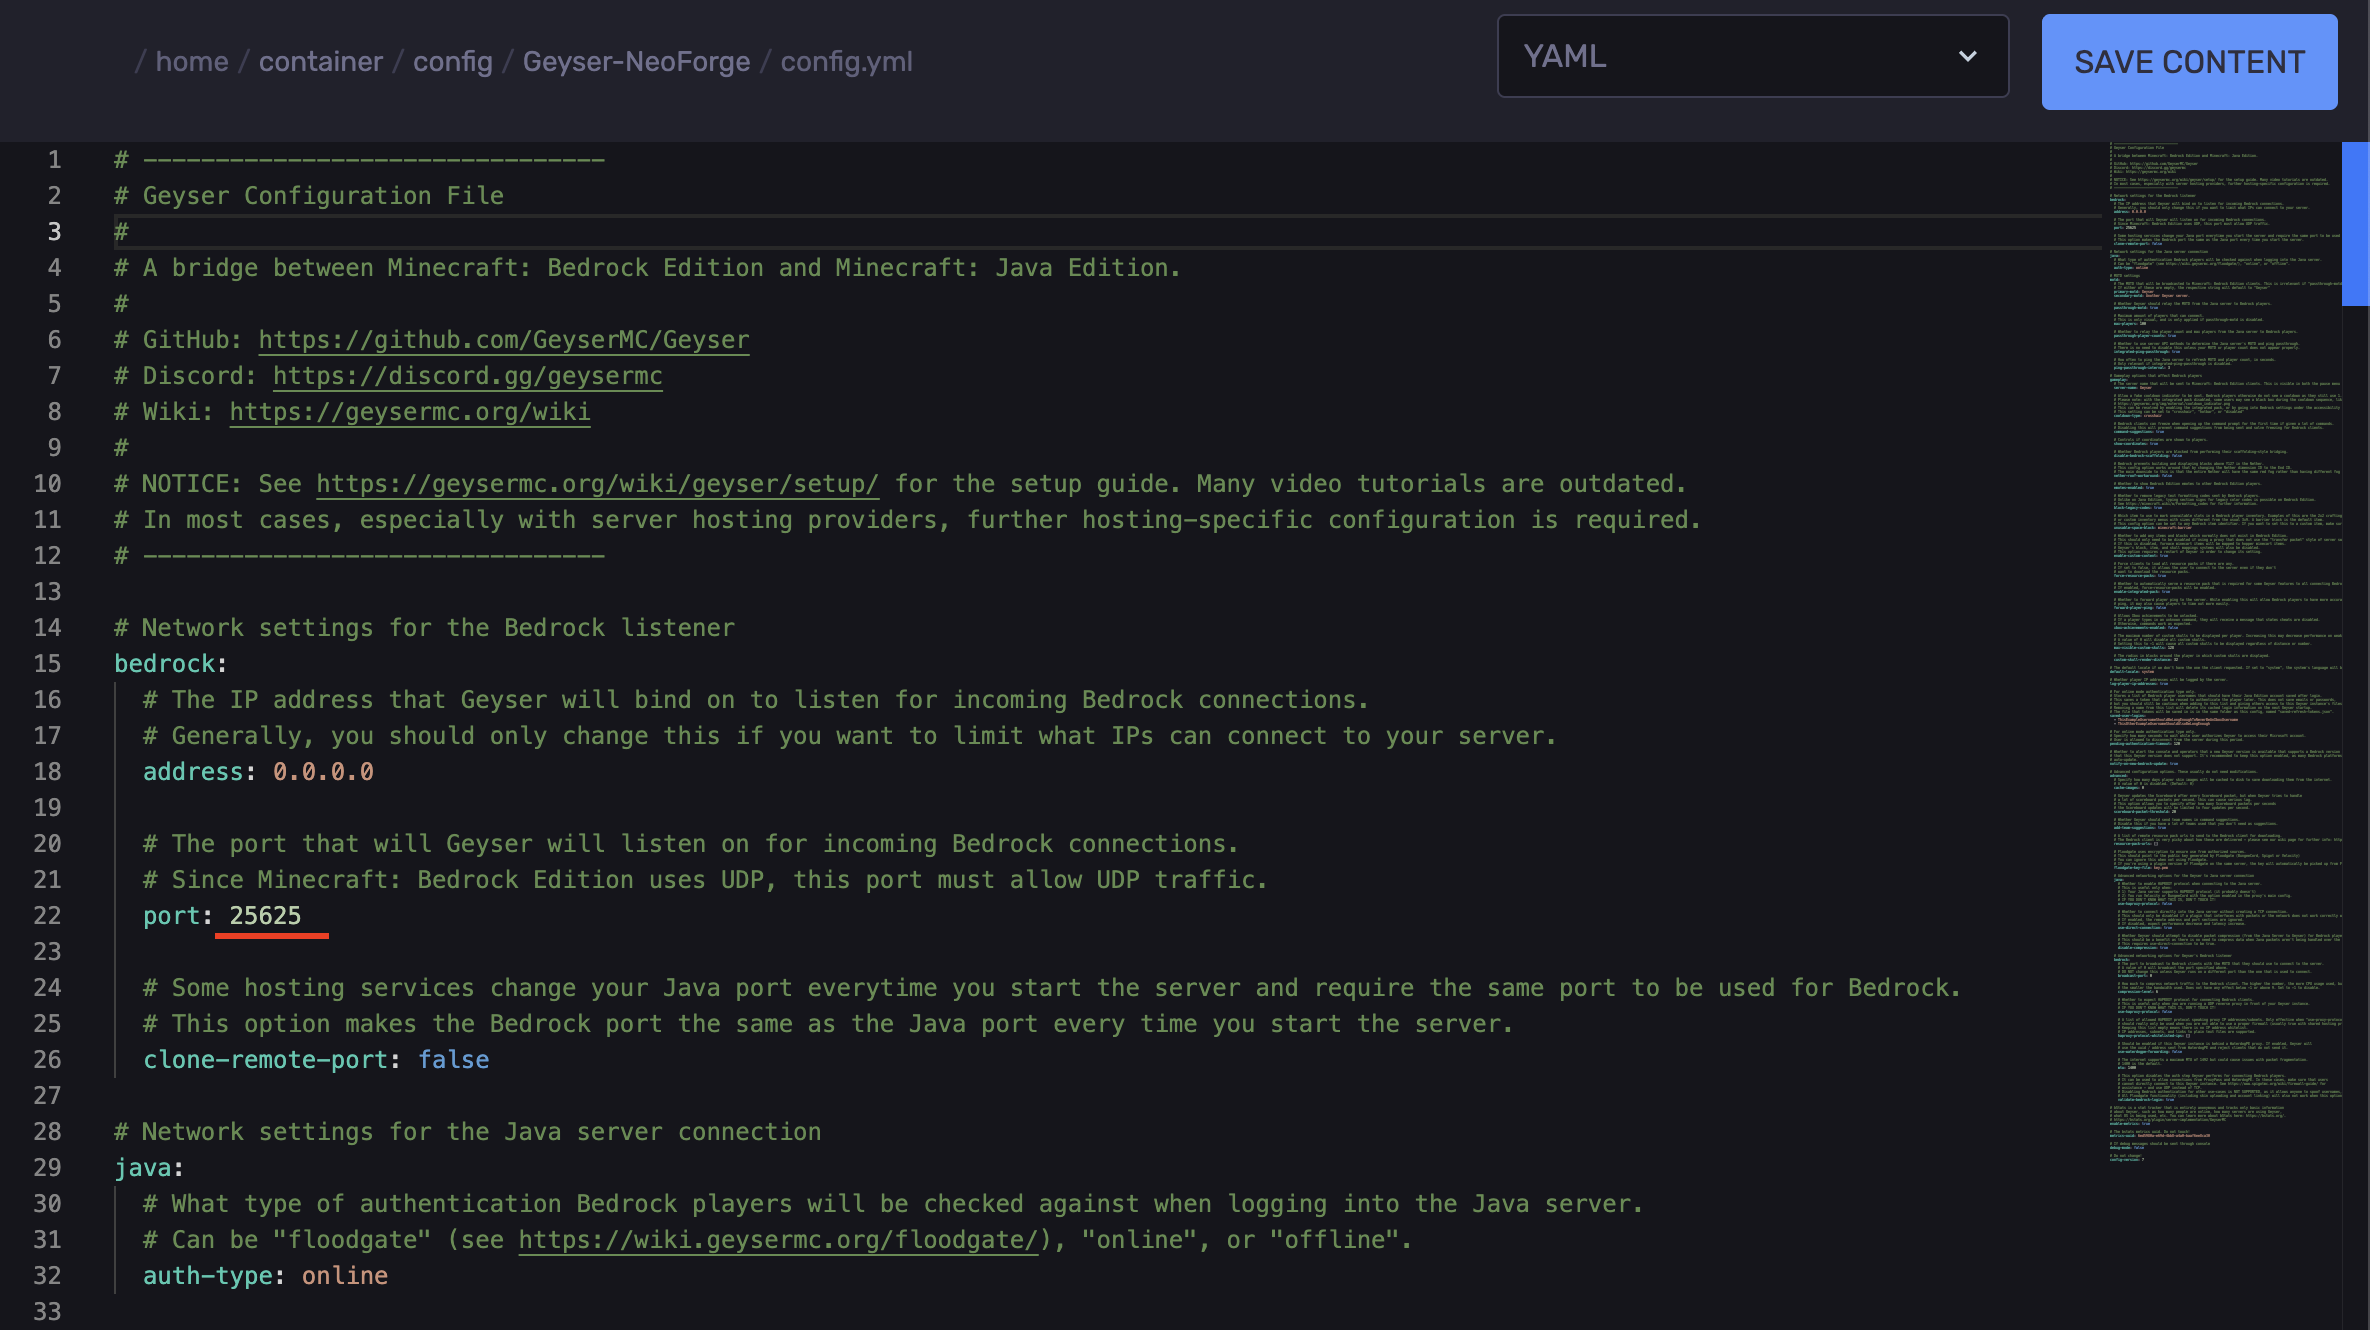
Locate the line `port:`
-
Replace`19132` with the port generated.

-
Save the changes.
-
Start the server.
Installing the GeyserMC Mod
-
Install the compatible GeyserMC version.
-
Access your RocketNode Panel.
-
Stop the server.
-
Head over to the Networks tab.
-
Click “Create Allocation” and copy the newly generated port.
-
Navigate to the Files tab.
-
Upload the jar file to your `mods` folder.
-
Start the server.
-
Stop the server.
-
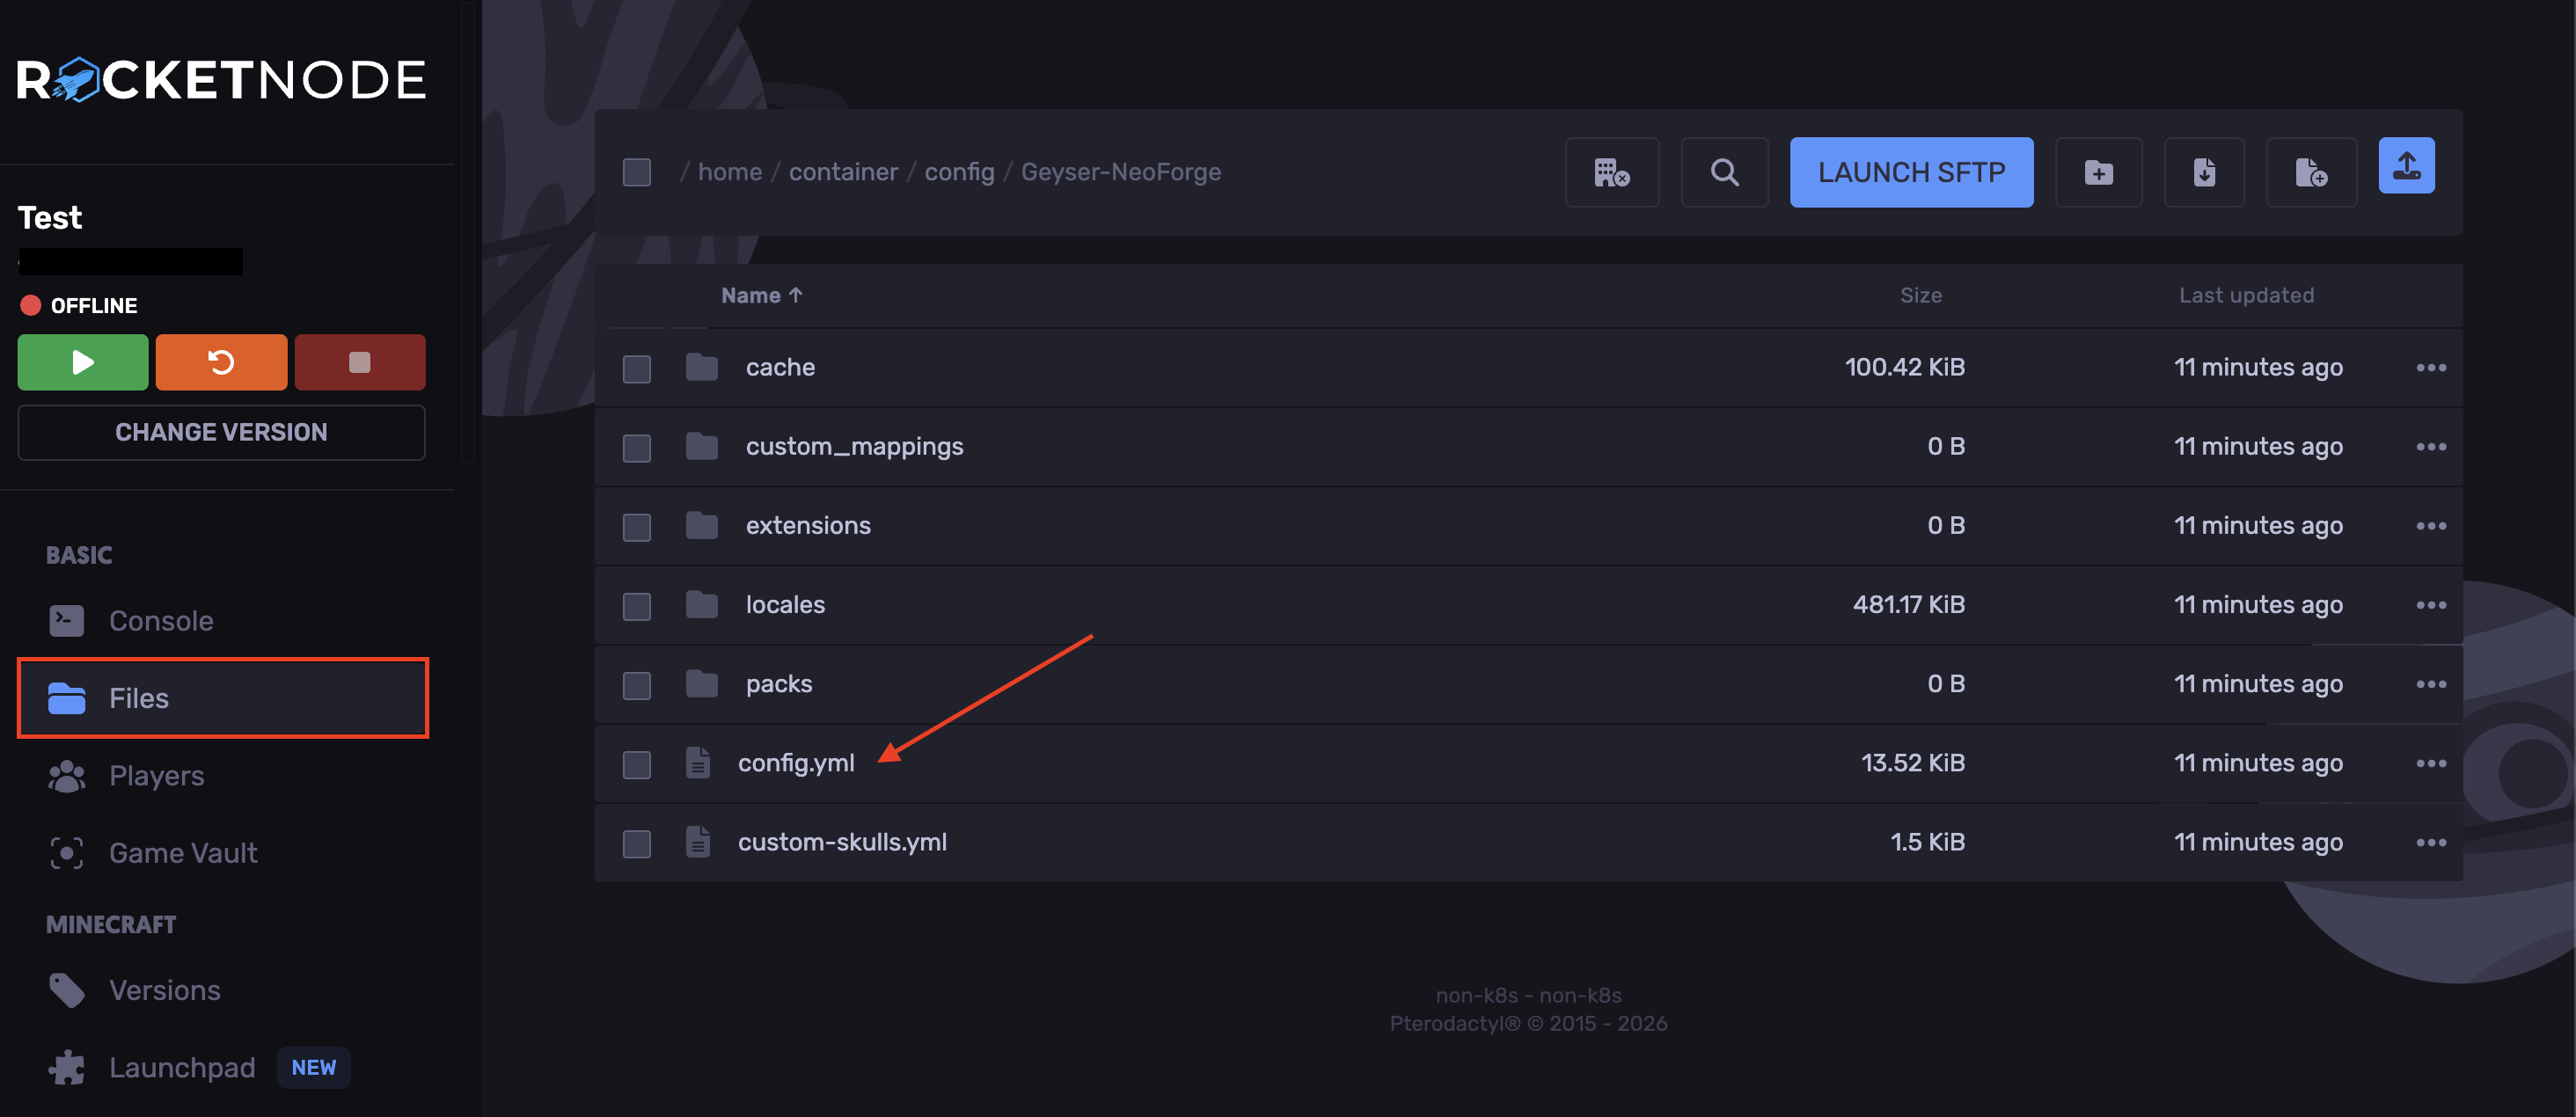
Open the `config` folder and locate the `Geyser-Fabric` or `Geyser-NeoForge` folders.
-
Open the `config.yml` file.
-
Find the `port:` line.
-
Replace the `19132` with the generated port.
-
Save the changes.
-
Start the server.
MOTD and Server Name (Optional)
-
Locate the lines `primary-motd:` and `secondary-motd:`
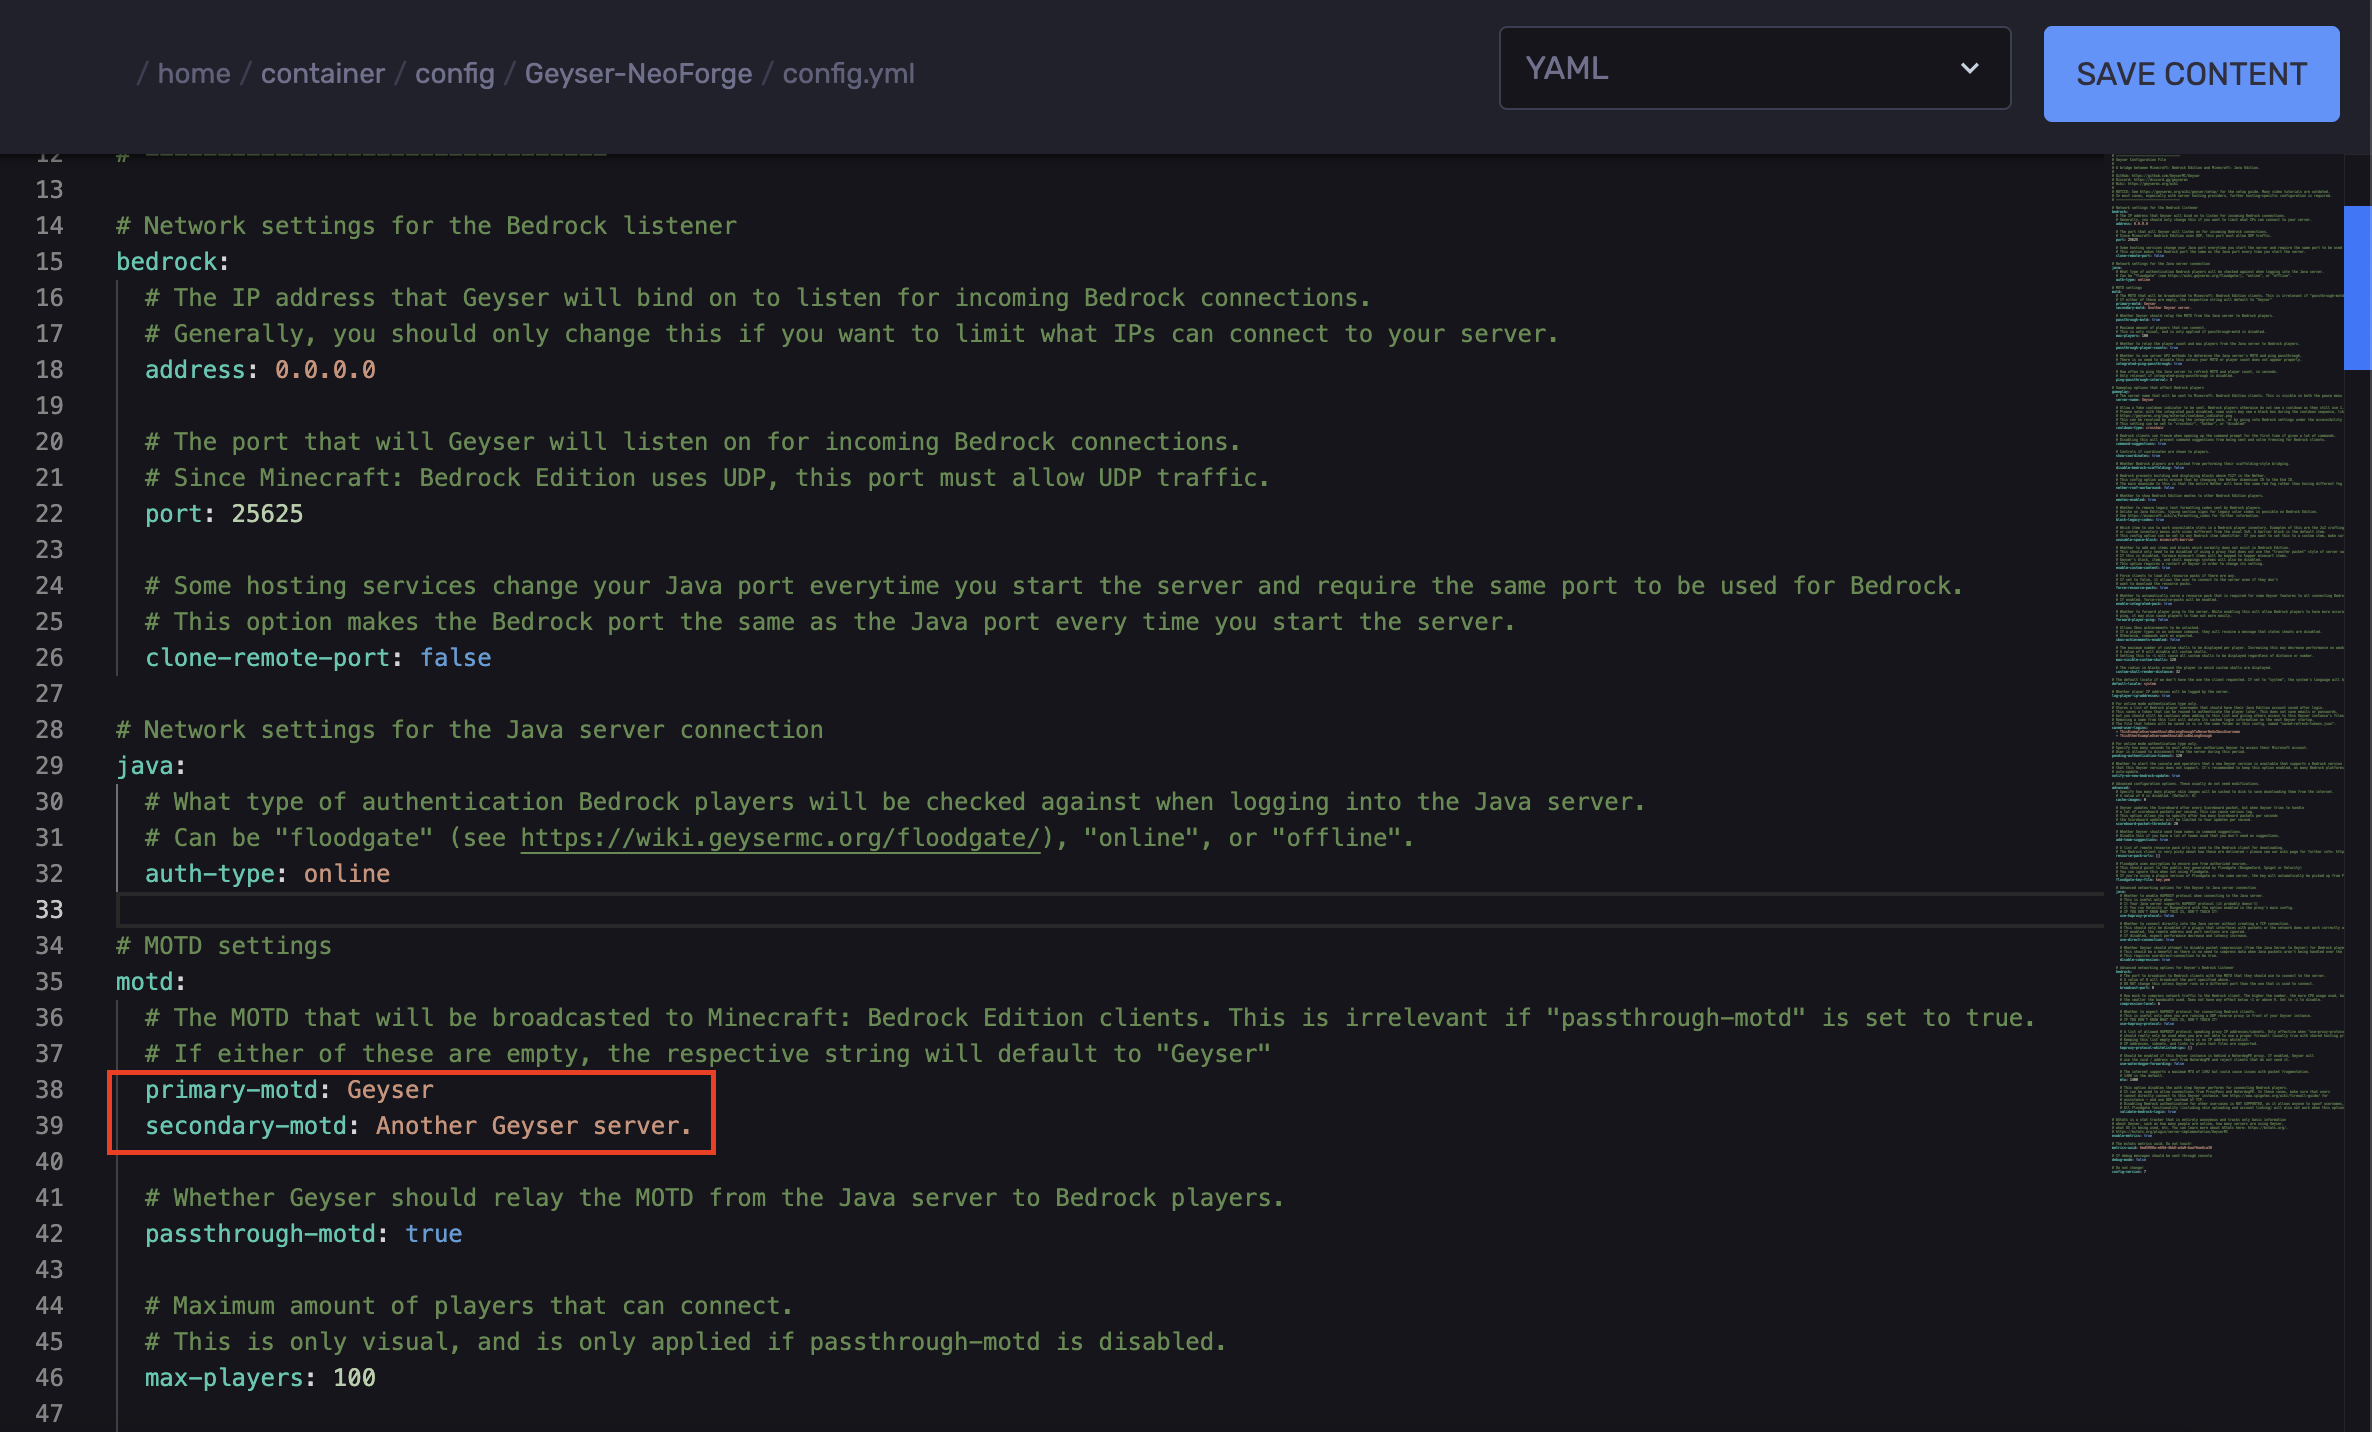
-
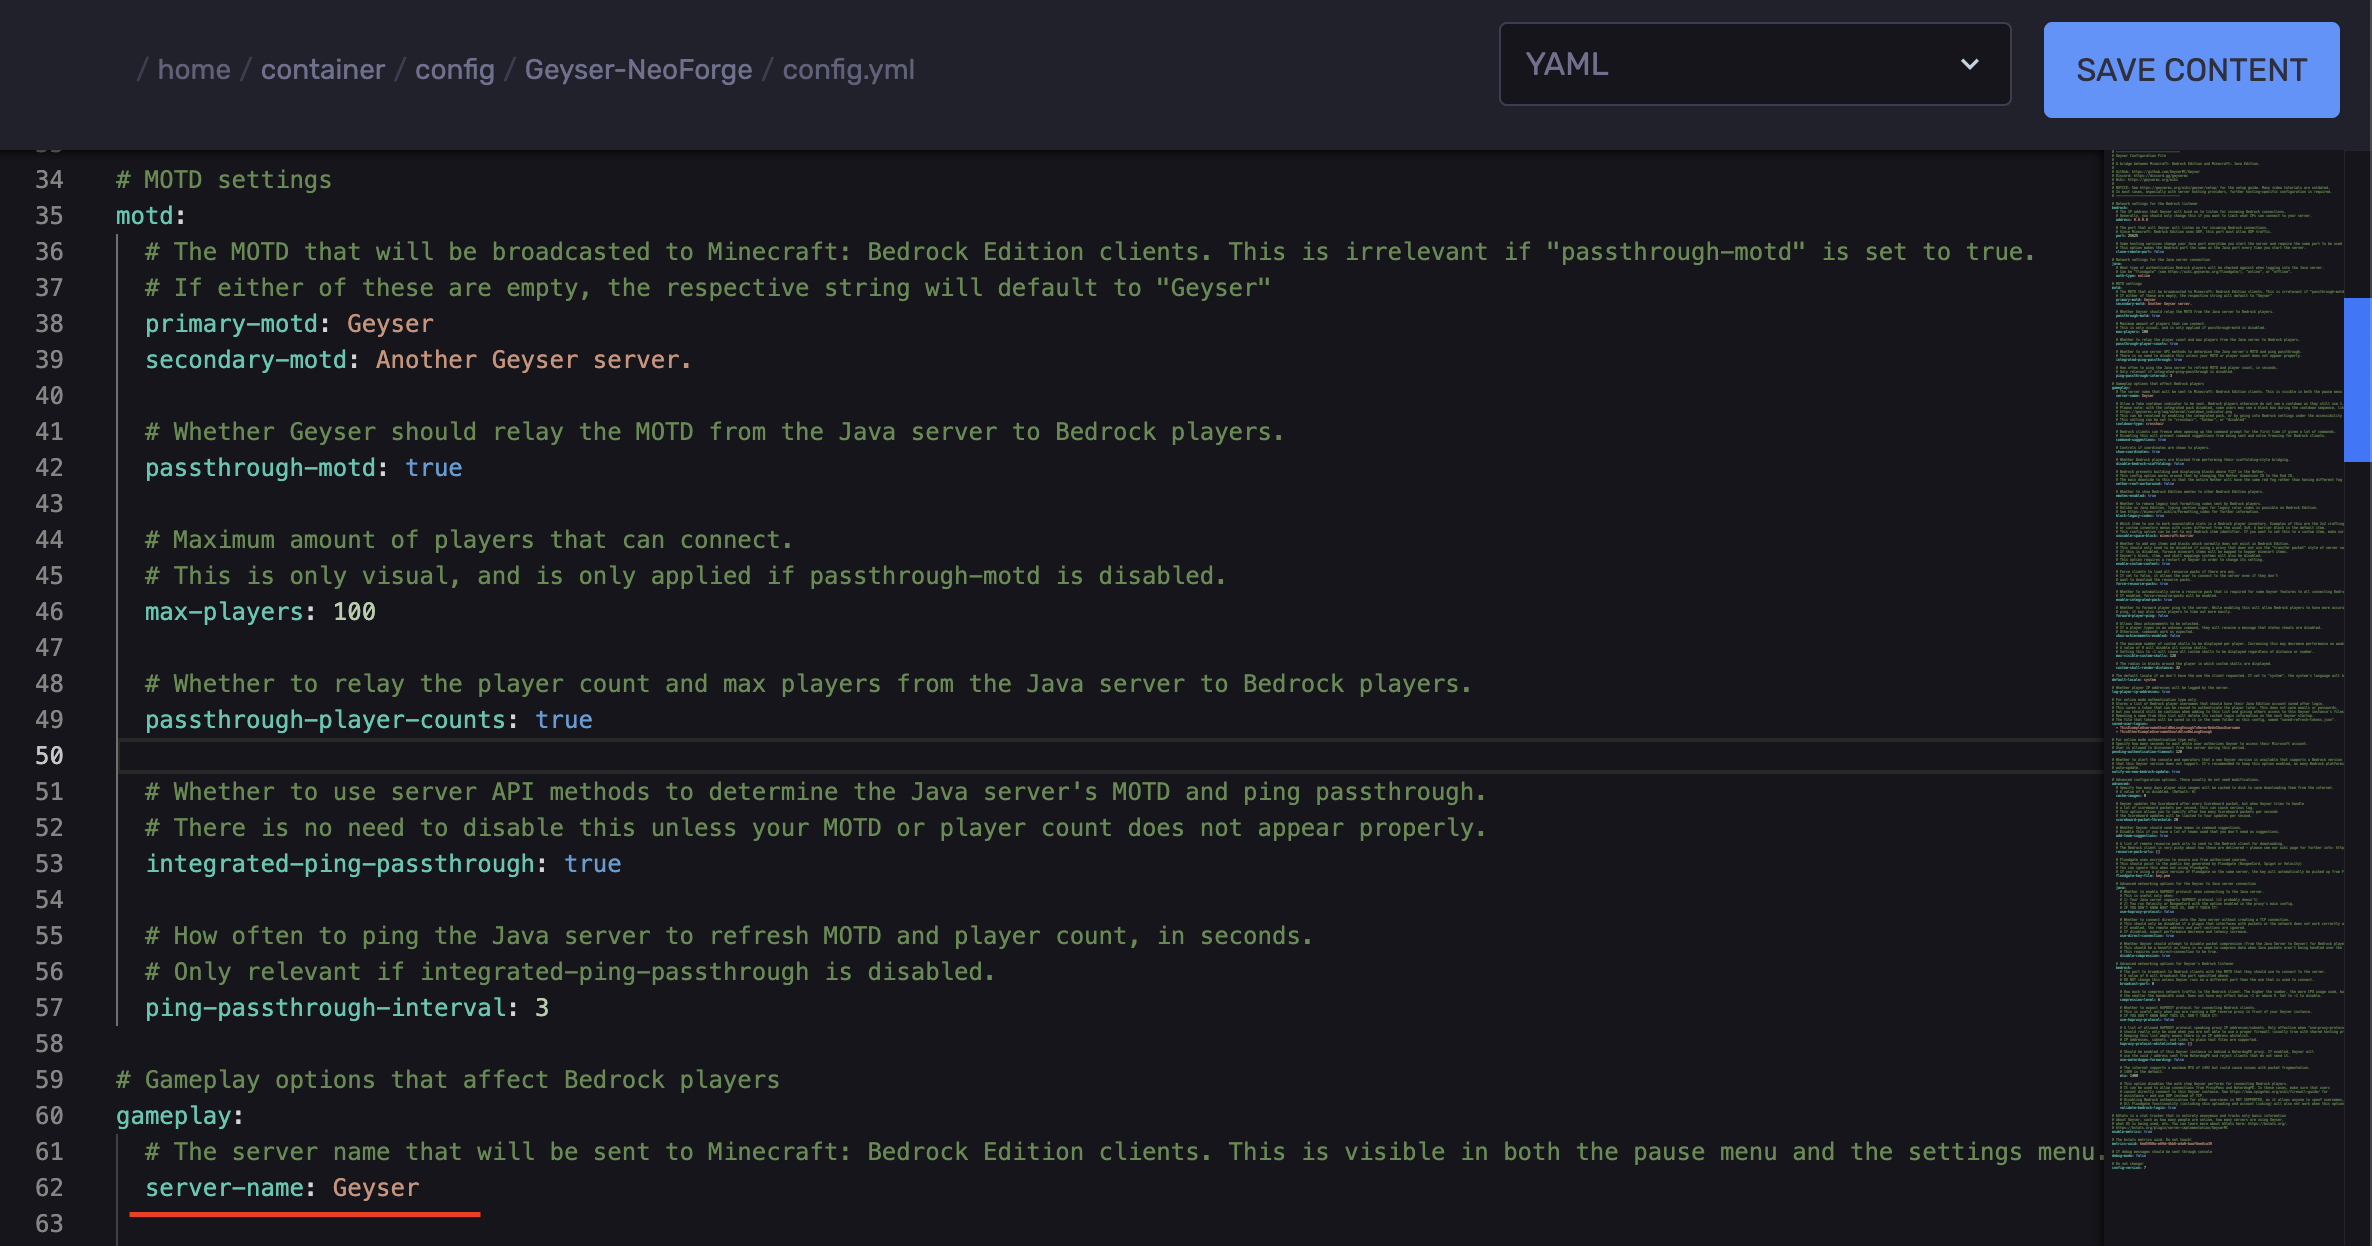
Find the line `server-name` and set it to your server name to make both visible in the pause menu and the settings menu.
Setup Floodgate (Optional)
Floodgate is an extension for GeyserMC that allows Bedrock players to join a Java Minecraft server without needing a Java Edition account. Without Floodgate, Bedrock users must authenticate with a Java account before joining, but with Floodgate installed, they can connect directly and play without that extra step.
-
Install the compatible Floodgate version.
-
Access your RocketNode Panel.
-
Stop the server.
-
Navigate to the Files tab.
-
For NeoForge/Fabric servers, you’ll need to upload it to the `mods` folder.
-
For Spigot/Paper servers, you’ll need to upload it to the `plugins` folder.
-
Start the server.
-
Stop the server.
-
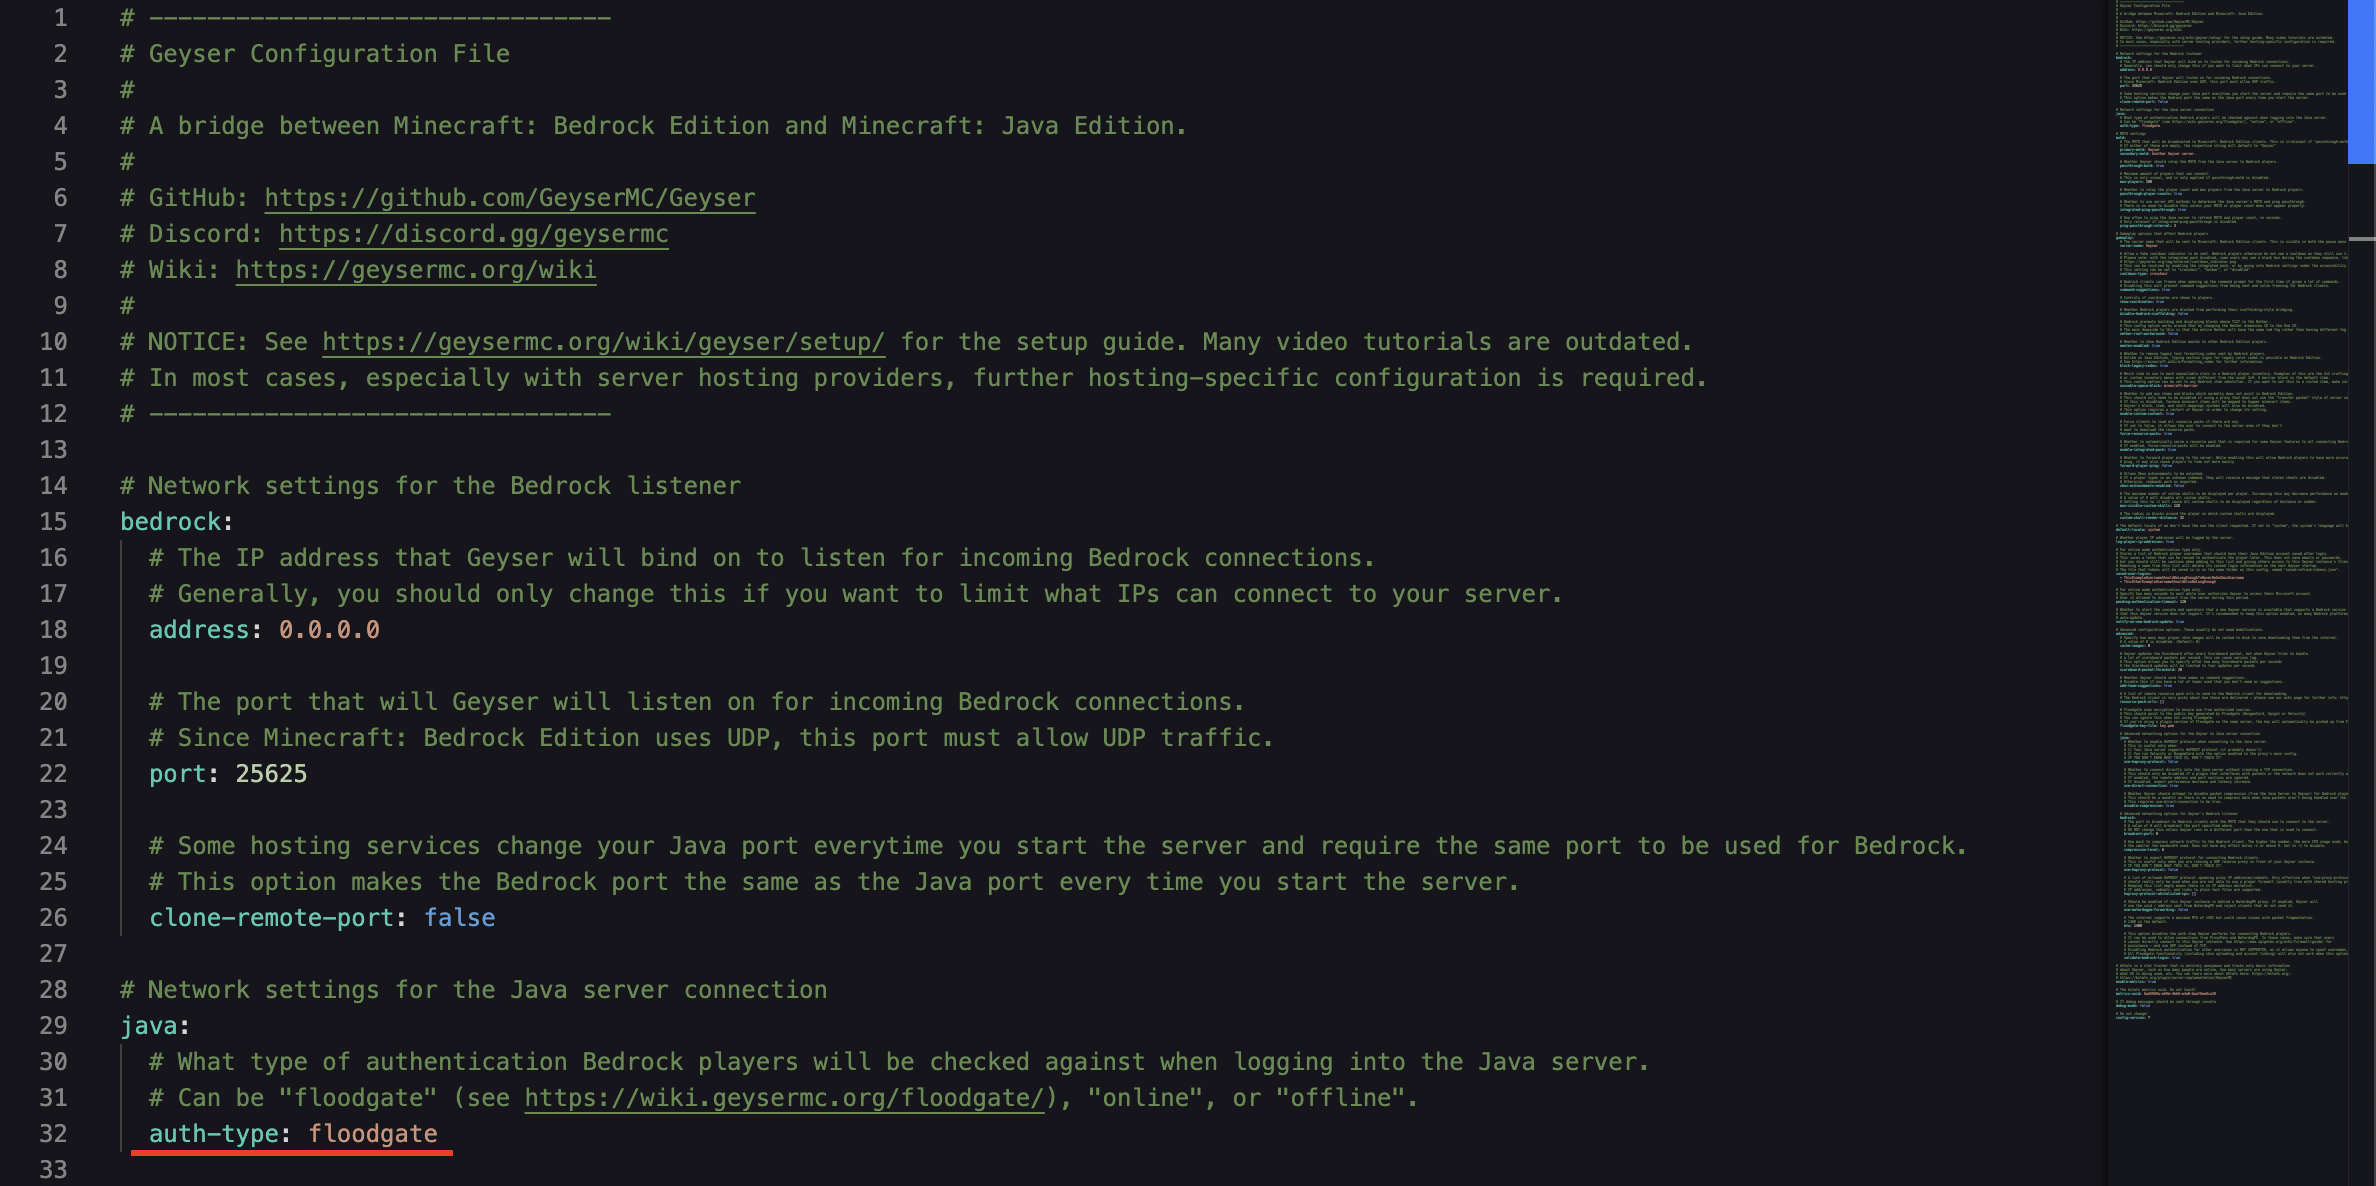
In the `config.yml` file, find the line `auth-type:`
-
Replace `online` with `floodgate`
-
Save the changes.
-
Start the server.
Find out more about Minecraft server hosting with the help of our Knowledgebase articles that can be found here. For any questions please contact the support team via Discord or on-site Tickets.
your hosting partner
RocketNode offers fast and affordable game and VPS hosting solutions on reliable and efficient hardware with AMD Epyc architecture and NVME storage to assure high performance.
See games & pricing