How To Install & Configure Luckperms
This blog will show you how to setup Luckperms, as well as configuring it to your needs.
Introduction
LuckPerms is a fantastic plugin that you can use to manage permissions in Minecraft. It’s a powerful tool that allows you, as a server administrator, to control and customize access rights for players and groups.
With LuckPerms, you can create and modify permission nodes to determine what actions players can perform in the game. Whether it’s building, interacting with specific blocks, or using certain commands, you have complete control over these permissions to tailor them to your server’s needs.
One of the great features of LuckPerms is its support for inheritance. You can assign permissions to groups, and those permissions will automatically be inherited by all the members of that group. This saves you a lot of time and effort, as you don’t have to manually configure permissions for each individual player.
What’s most important is that LuckPerms also offers a web-based administration interface, making it incredibly convenient for you to navigate through the graphical interface and manage permissions, groups, and players. It makes the whole process much more user-friendly and organized.
How to Download LuckPerms
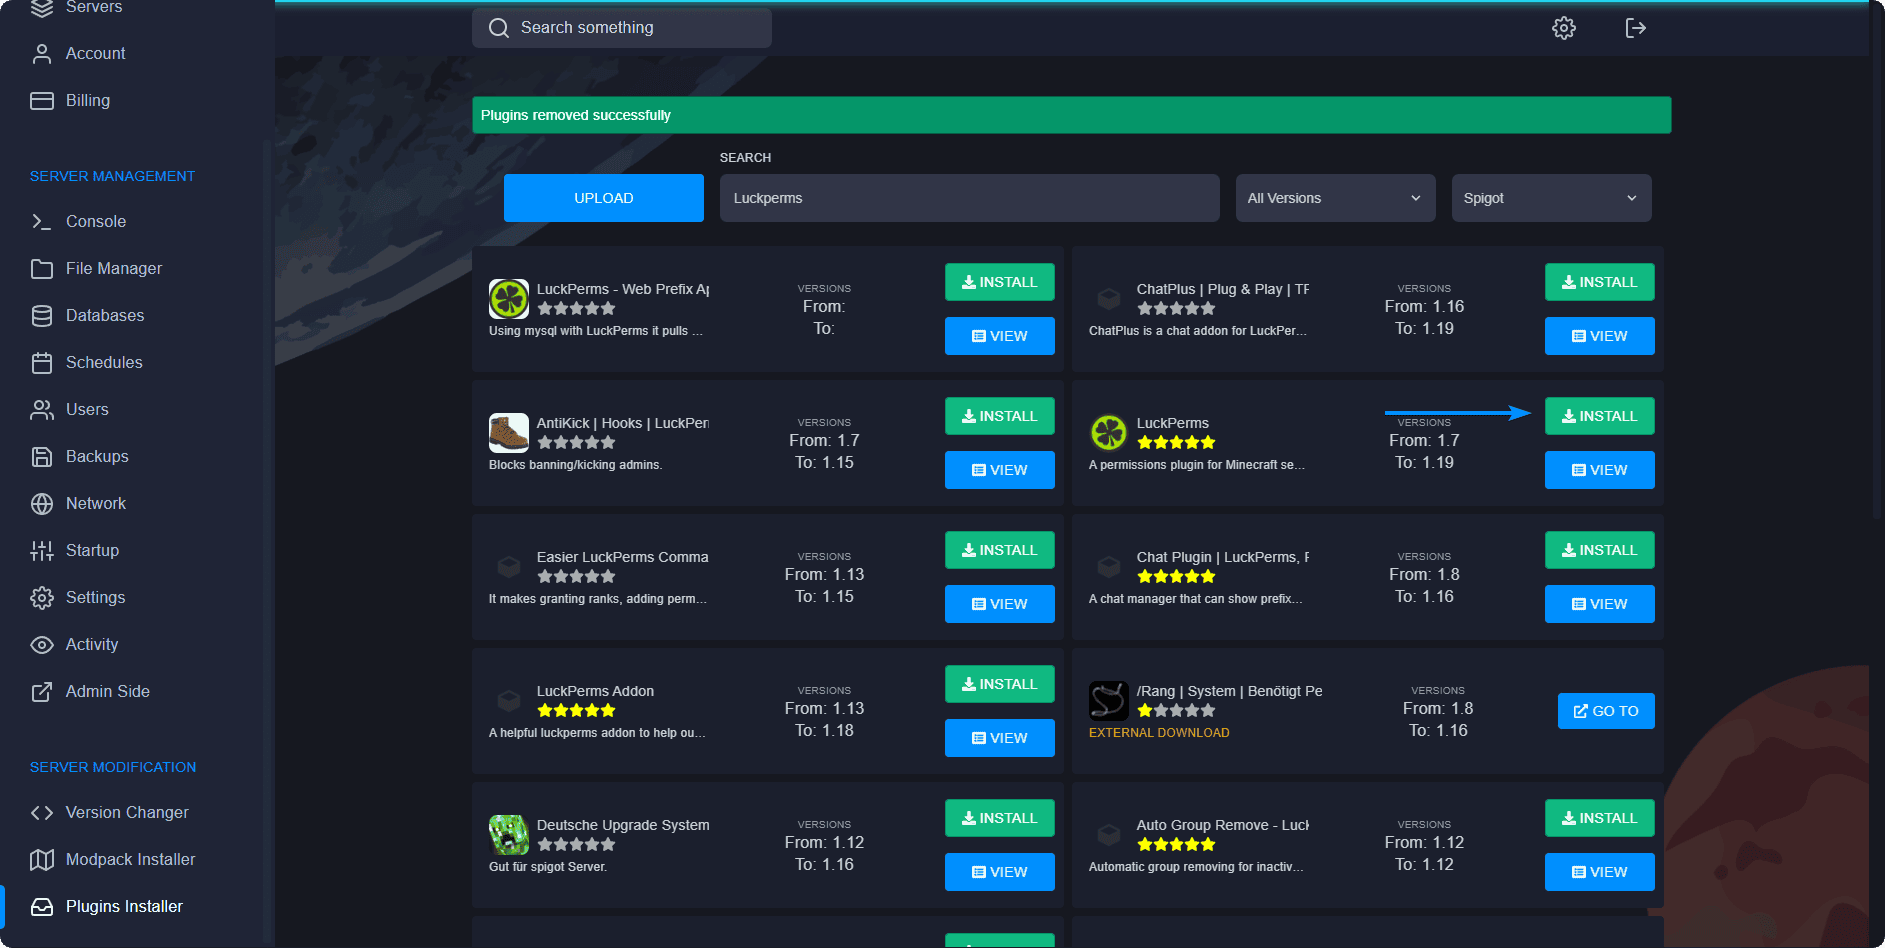
You can easily use our advanced plugin installer feature in order to quickly install LuckPerms wihout the hassle of going to any third-party websites in order to get it installed. Follow our step-by-step guide in order to make sure this process is as easy as it can get!
- Head over to the RocketNode Panel.
- Open the Plugins Installer section of the Panel.
- Search for “Luckperms”.
- Click INSTALL and wait until it has installed.
- Restart your server in order to complete the installation for the LuckPerms plugin.

Once you’ve restarted your server, you should be greeted by a message similar to this one in your server’s console:

You can double-check this by typing lp into your server console.
How to Configure LuckPerms
Upon installing LuckPerms you can access the web-editor by typing lp editor in your server console and clicking the link generated the plugin.

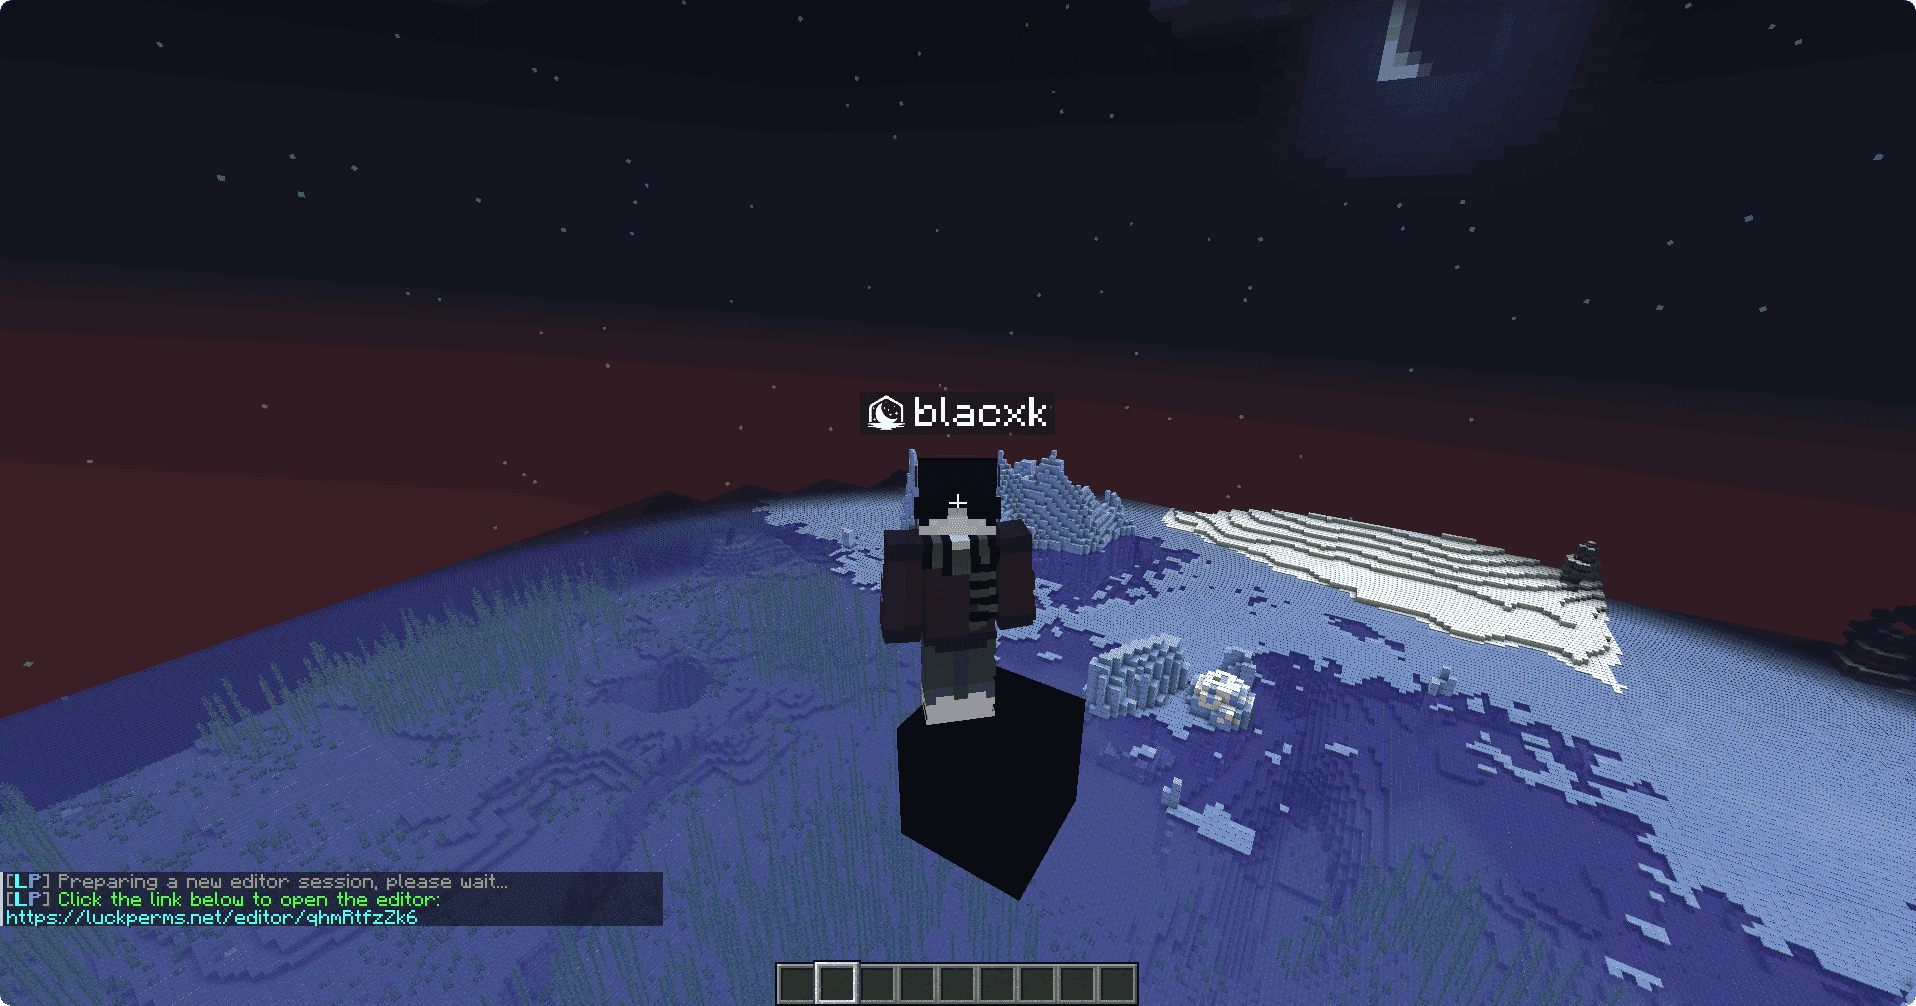
Your web-editor website can also be accessed directly in-game from your Minecraft server by typing the same command: /lp editor. It should look something like this:

After you’ve gotten into the web-editor, you can make groups to avoid adding every permission for each player individually, even if they should belong in the same group. A default group should be already defined, as that’s the group all the players claim upon joining the server.
If you wish to edit the default group, make sure that you DO NOT assign permissions that can give all of your players access to important commands.
Example
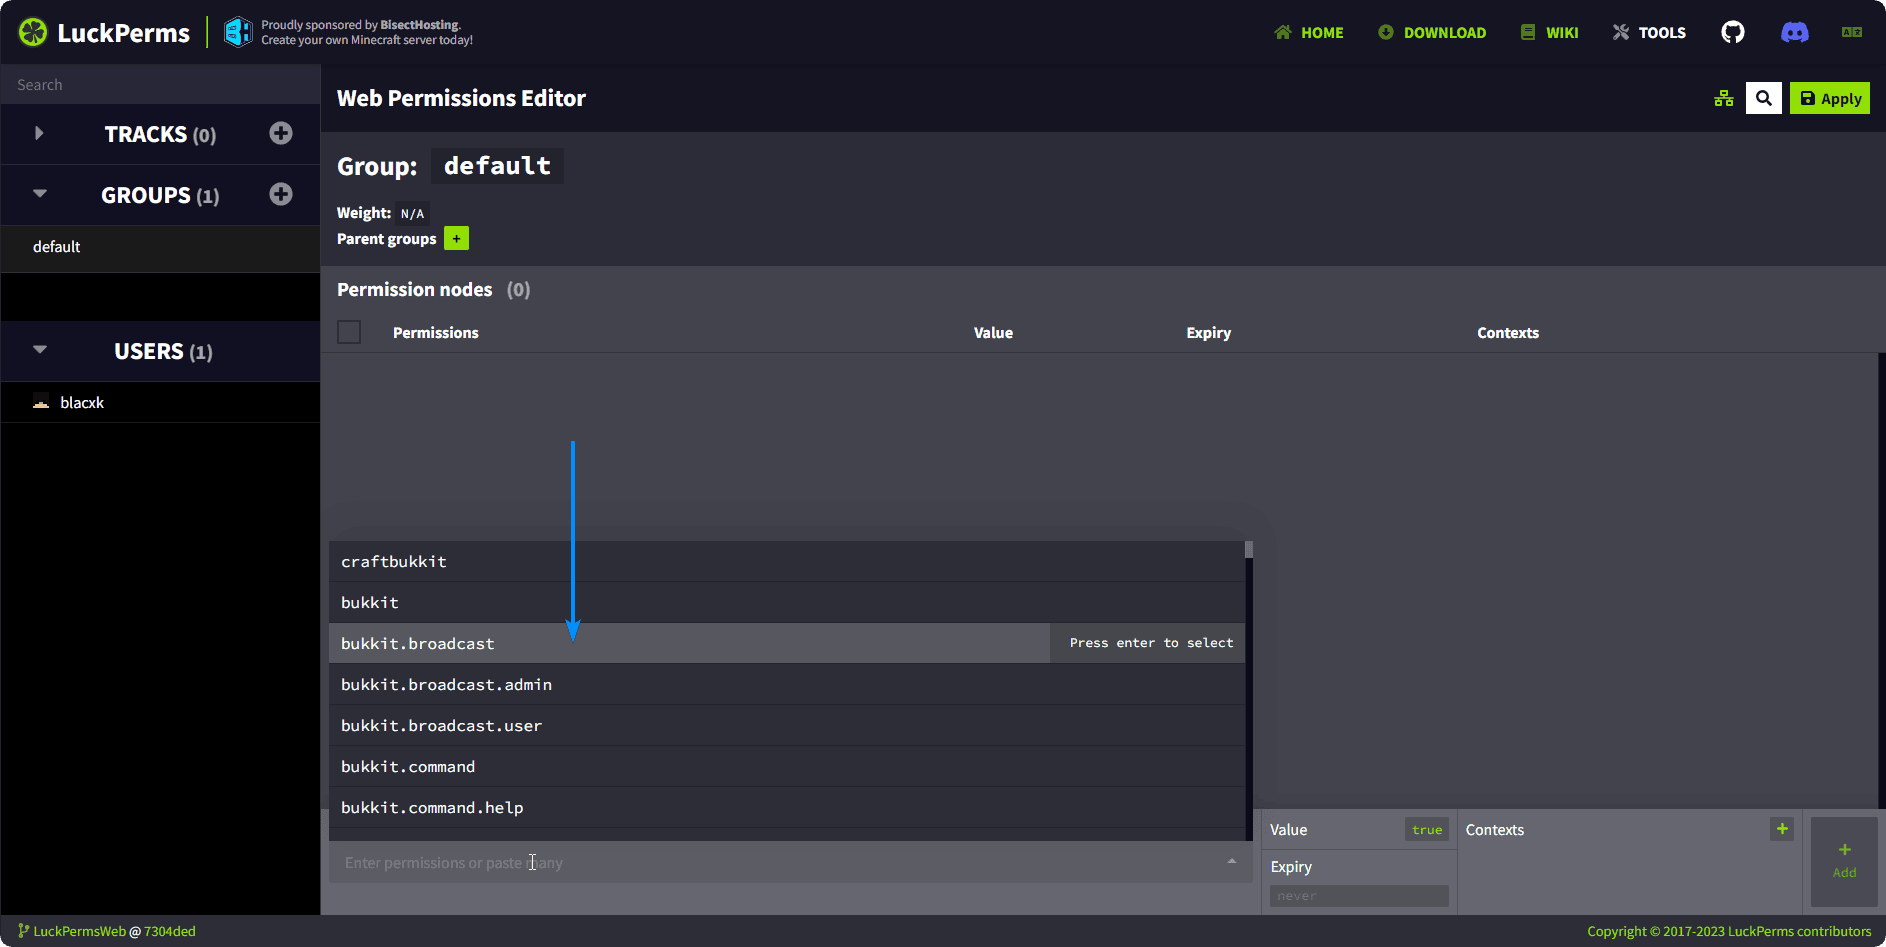
Let’s say you want to assign the bukkit.broadcast permission to all the players in the server. To do this, you’ll have to navigate over to GROUPS > default. A different layout should appear similar to the one showed below.

Upon clicking the search bar, you can search for your specific permission (bukkit.broadcast in the case presented). After selecting your permission, or permissions in case you want to add more, you can click the Add button on the far right.
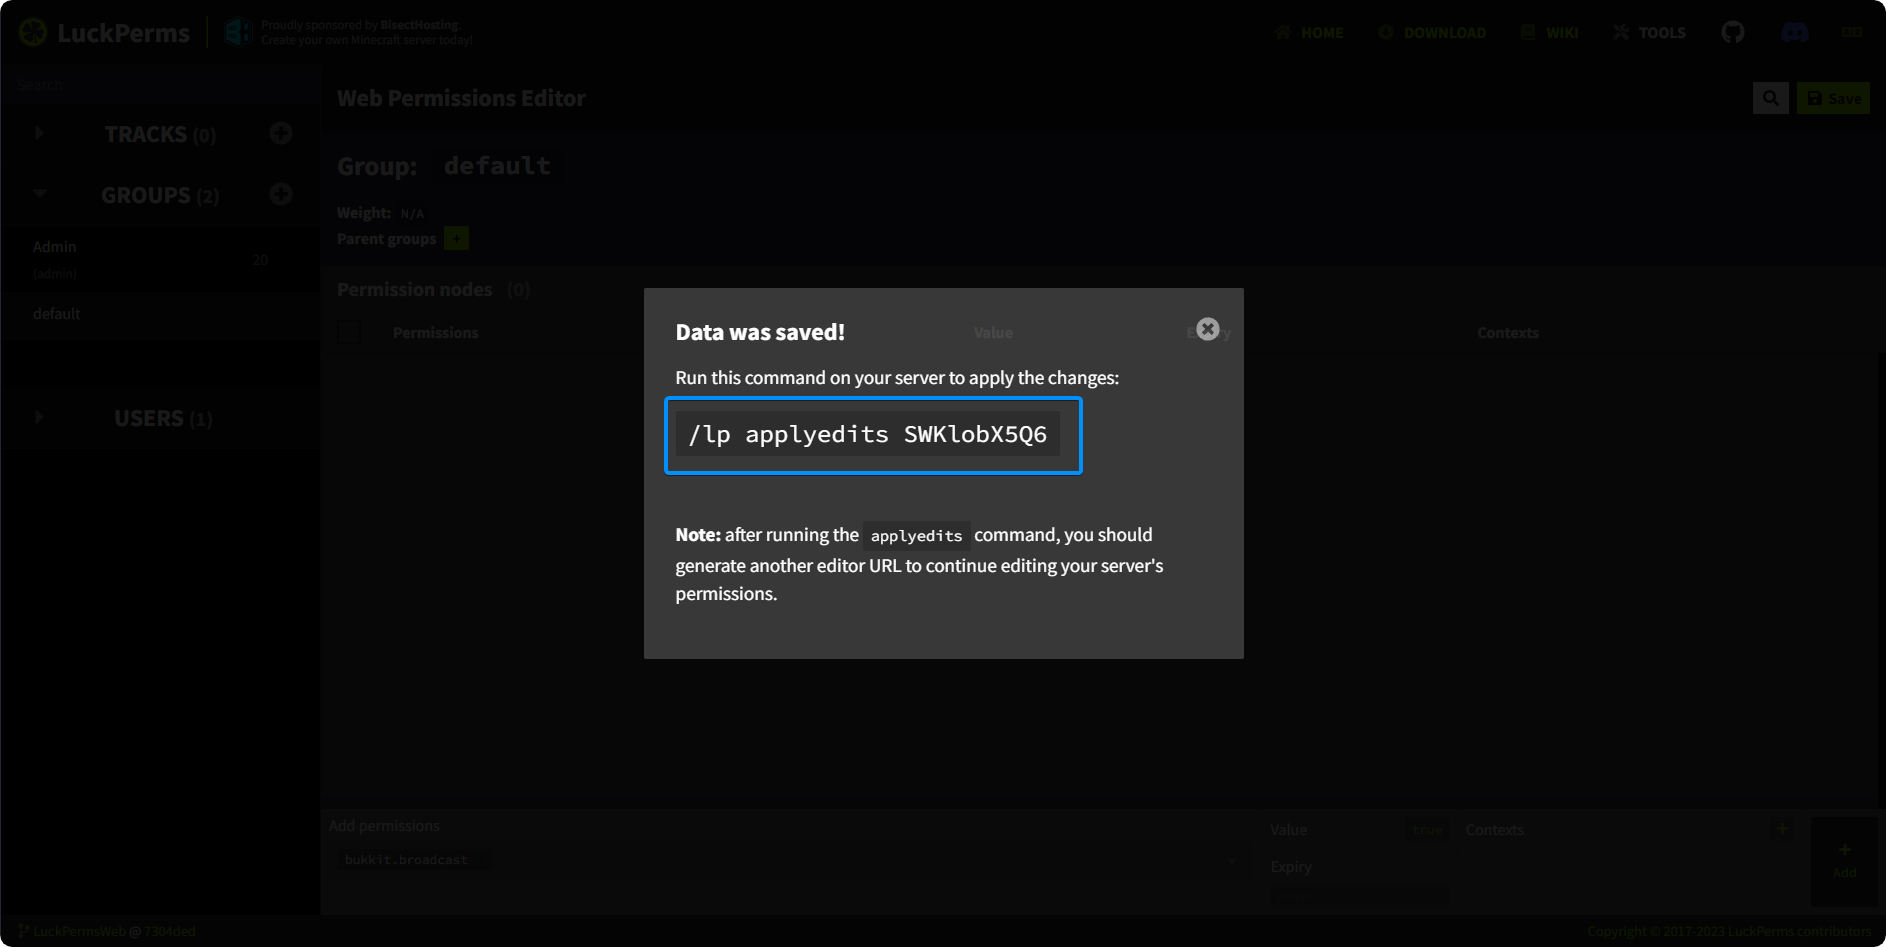
After you’ve assigned your specific permissions, MAKE SURE to click the Apply or Save button in the top-right corner (this depends on whether you’ve run the initial command from your server’s console or directly in-game). A prompt should appear if you’ve run the command in-game saying something similar as shown below. You will have to copy & paste this command in your server to save all the changes you’ve made.

Conclusion
In conclusion, installing and configuring LuckPerms is a straightforward process that empowers Minecraft server administrators with comprehensive permissions management. By following a few simple steps, you can harness the full potential of this powerful plugin and enhance your server’s gameplay experience.
your hosting partner
RocketNode offers fast and affordable game and VPS hosting solutions on reliable and efficient hardware with AMD Epyc architecture and NVME storage to assure high performance.
See games & pricing
