
How To Install & Setup Dynmap
Introduction
Are you an avid Minecraft player who wants to take your gameplay experience to the next level? Look no further than Dynmap, a powerful plugin that allows you to create an interactive map of your Minecraft world. Whether you're hosting a server or playing solo, Dynmap provides a visually stunning and immersive way to navigate and explore your virtual realm in real-time.
How to Download Dynmap
Downloading is a really simple process that you can follow in our guide to make sure you've installed it successfully!
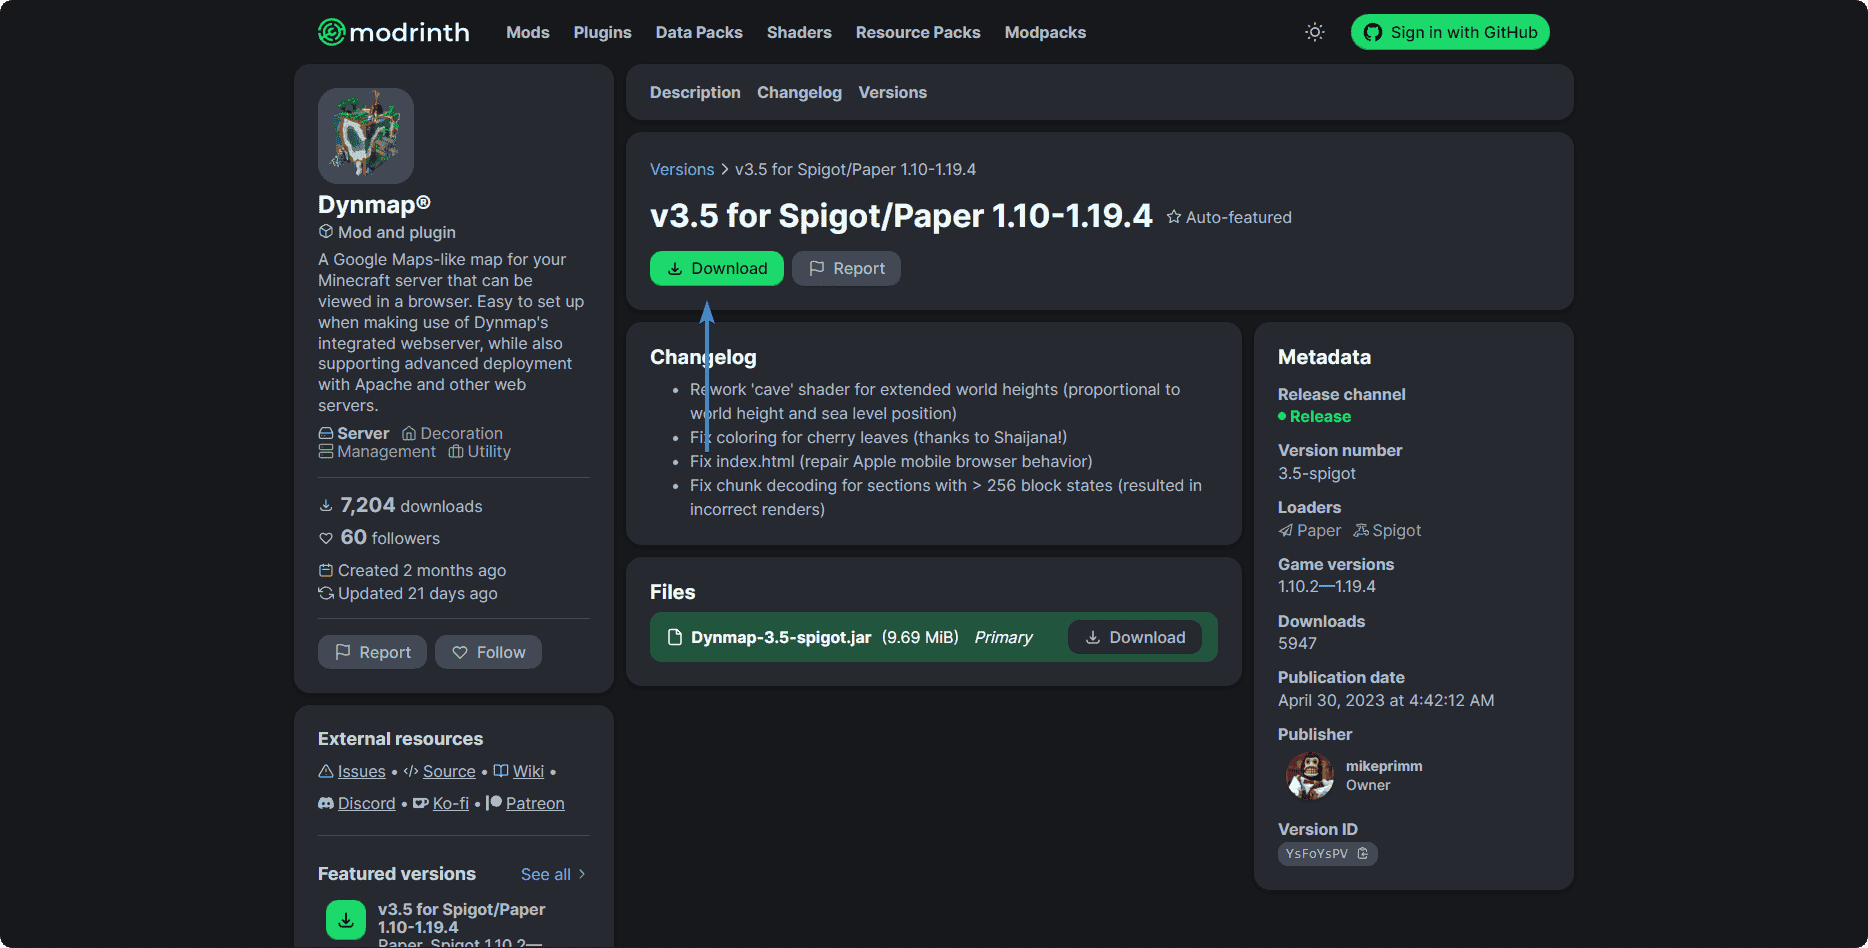
- Search for Dynmap® online, or just click the embedded link.
- Click the Download button in order to download your plugin.
How to Install Dynmap
Once you've downloaded your plugin, installing it on your server is as easy as downloading it! We'll try to make this as hassle-free in order for you to have a pleasurable experience installing Dynmap.
- Head over to the RocketNode Panel.
- Open the File Manager section of the Panel.
- Open the plugins folder.
- Drag & drop your Dynmap-3.5-spigot.jar file in our Panel.
- Restart your server in order to apply the Dynmap plugin.
If you've successfully followed all the steps, Dynmap should now be installed on your server! However, additional configuration is needed to make sure Dynmap is correctly working.
How to Configure Dynmap
Firstly, a port change will be needed in order to configure Dynmap. You can do this by following the next steps:
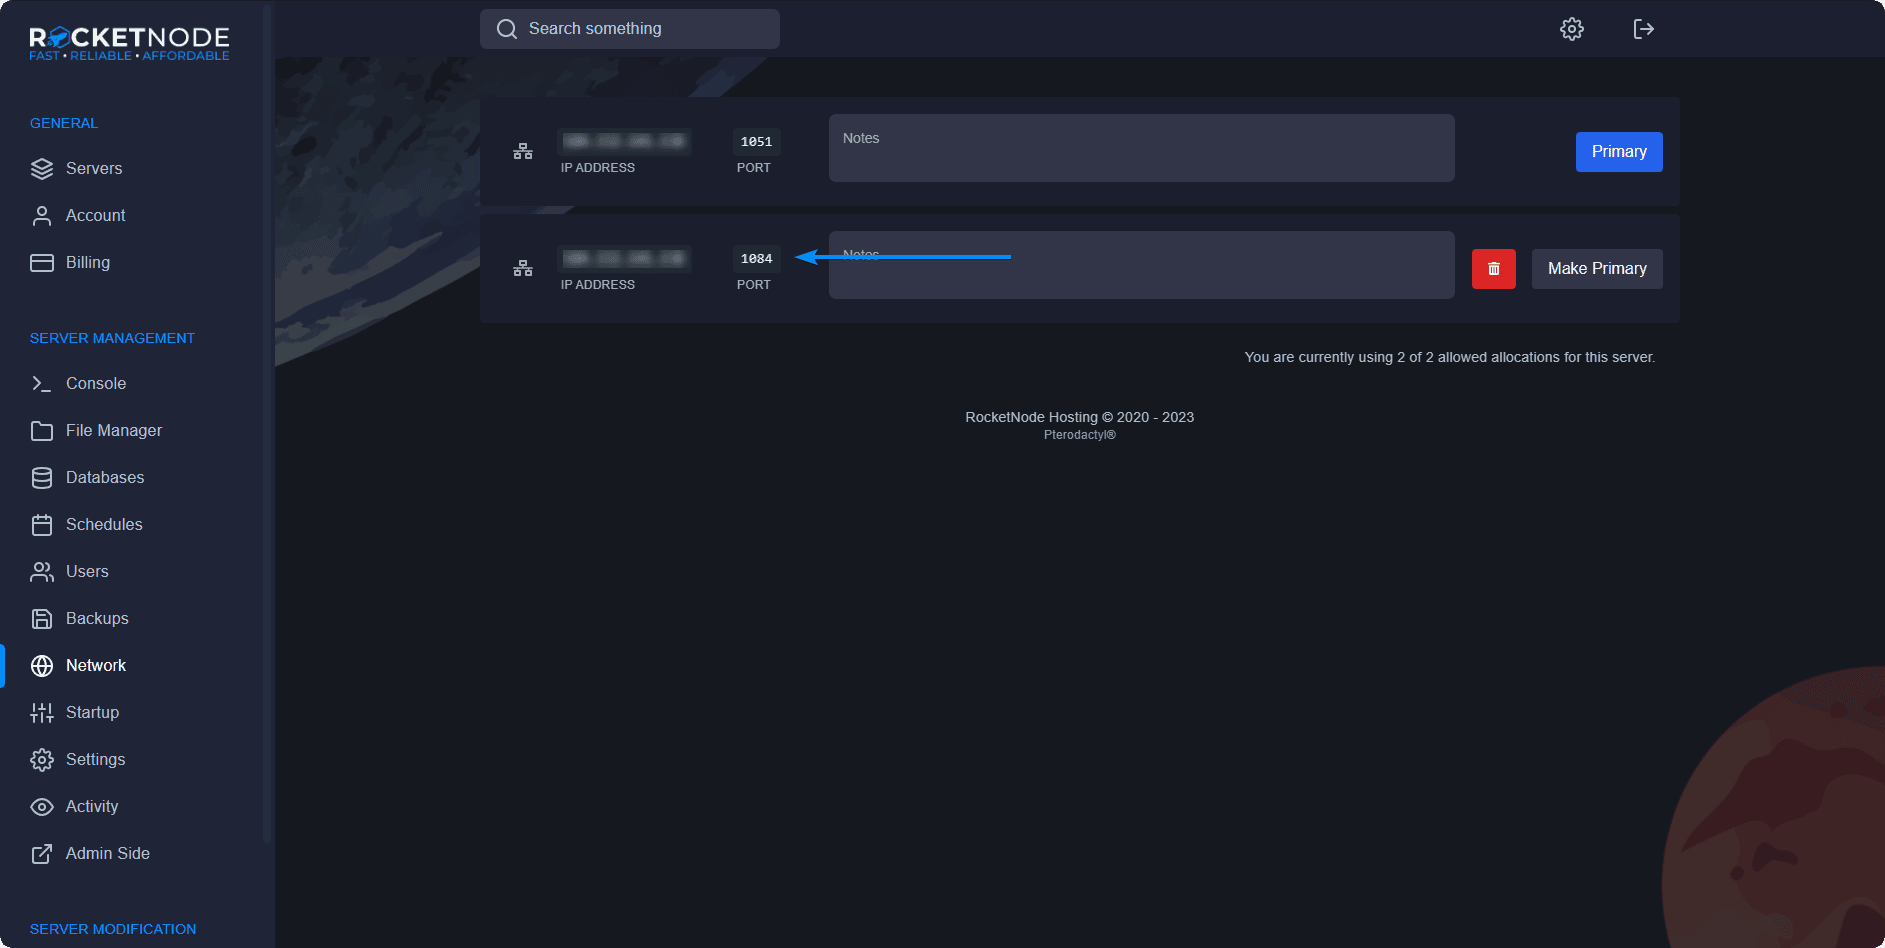
- Go over to the Network section of the Panel.
- Make sure to copy your port from your non-primary allocation. (as seen in the screenshot)
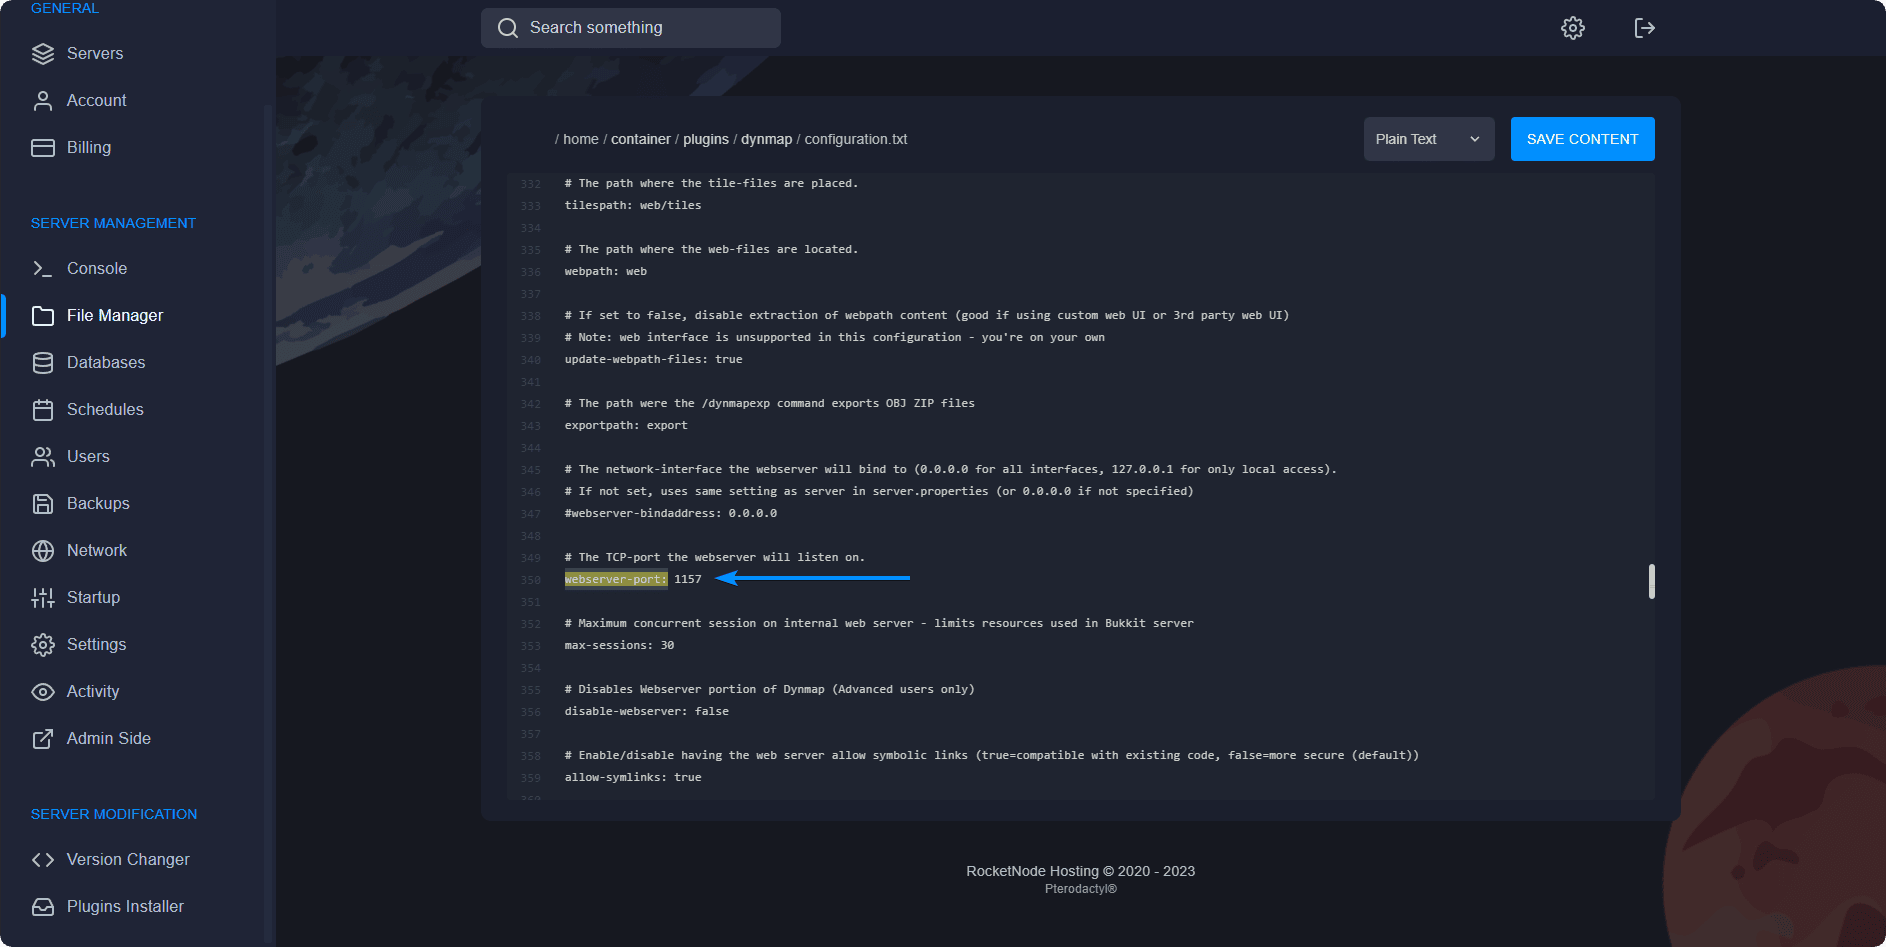
- Go over to the File Manager section of the Panel.
- Navigate over to
home / container / plugins / dynmap. - Open the configuration.txt file.
- Click anywhere inside your configuration file and press CTRL + F.
- Search for
webserver-port:in the search prompt. - Once you've found the setting needed, change the current port to the port you've previously copied.
And that's pretty much it! Installing and configuring Dynmap is an easy process which you can get done in a couple of minutes. Additional configuration can be made by reading and configuring your configuration.txt.
You can see your current Dynmap website by accessing the following link {your_server_ip}:{dynmap_port}.
To sum up, installing and setting up Dynmap provides an excellent way to enhance your Minecraft server experience. With its interactive map and real-time updates, Dynmap offers players a visually stunning and informative tool to navigate and explore your server. By following the step-by-step instructions outlined in this article, you can easily integrate Dynmap into your server and customize its features to suit your preferences.
