FiveM2 min read
How to Add Vehicles to FiveM Server
Learn how to add custom addon vehicles to your FiveM server by uploading the vehicle resource, adding an ensure line to server.cfg, and installing vMenu to spawn them.

How to Add Vehicles to FiveM Server
Adding custom vehicles is a practical way to give your FiveM server more variety and a more distinct gameplay experience.
If you're wondering how to add vehicles to a FiveM server, begin by downloading and extracting a FiveM-ready addon vehicle resource, then place its vehicle files, model assets, and meta files into a new resource folder in your server's resources directory, add an ensure line in server.cfg, and start the server so the vehicle loads in-game. Addon vehicles add new models alongside the existing GTA V vehicle roster, which keeps the original models intact on your server. By contrast, replace vehicles overwrite existing models and can create conflicts when multiple resources target the same vehicle.
For FiveM server admins and modders, this guide walks through the full setup: installing vMenu for easy spawning, creating the vehicle resource folder, uploading the files, editing server.cfg, and starting the server to apply the change. It also helps you begin with the right download, since choosing proper FiveM-ready files avoids compatibility issues and gives players a smoother experience on a server that feels more custom than stock.
You may need to add vMenu to your FiveM server. vMenu will make it easy to spawn in-game.
Installing vMenu to Install Custom Vehicles
To install vMenu:
-
Access the RocketNode Panel.
-
Stop the server.
-
Go to the FiveM Scripts tab.
-
Search for vMenu.
-
Click Install Script.
-
Start the server.
Adding Vehicle Files
-
Access the RocketNode Panel.
-
Stop the server.
-
Go to the Files tab.
-
Navigate to the following directory:
txData/<your server folder>.base/resources -
Click Create Directory.
-
Name it
[cars].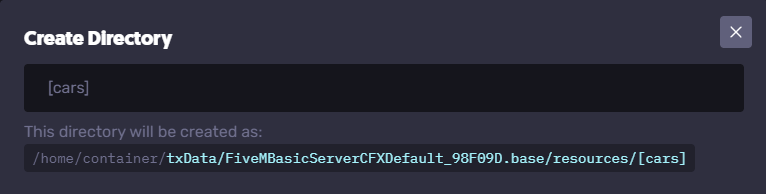
-
Inside the created folder, create a separate folder for each vehicle, then upload the vehicle folder there.
-
A proper addon resource to install custom vehicles should include an
fxmanifest.lua, astreamfolder for model files, and adatafolder for meta files. -
Head back to the .base folder.
-
Open the
server.cfgfile.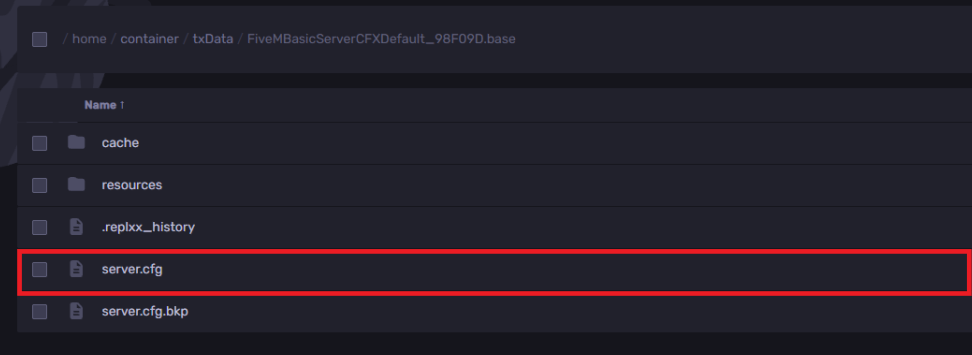
-
Add a
#carscomment, then add anensureline for the vehicle folder under it. For example, if the folder is namedvehicle, it should look like the following. Each resource needs its ownensureline so it loads on server boot.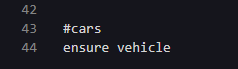
-
Click Save Content.
-
Start the server. Then restart the server resource and test the car in game.
Spawning and Testing Your Vehicle
-
On freeroam servers, use vMenu to spawn it, or use commands such as
/spawn mycarwith the spawn name fromvehicles.meta. -
A quick note: mismatched internal names can cause invisible cars or crashes.
-
Check handling values and test again so the vehicle feels realistic and balanced.
-
For performance, avoid oversized textures, high vertex count assets, and ultra-high-poly models in any stream setup, as they can increase memory usage, lag, and loading times.
-
Keep folders logically grouped inside
resources/, and be careful with a large pack because it can make debugging harder.
Find out more about FiveM server hosting with the help of our Knowledgebase articles that can be found here. For any questions please contact the support team via Discord or on-site Tickets.