
How to Install Mods on Your Satisfactory Server Using Satisfactory Mod Manager (SMM)
Easily install and manage mods on your server using Satisfactory Mod Manager.
Modding allows you to expand the gameplay of Satisfactory by adding new features, mechanics, and content. With Satisfactory Mod Manager (SMM) and SFTP access, you can install mods directly to your RocketNode server and sync them with your local game client.
This guide will walk you through the process of adding mods to your Satisfactory server and ensuring that your client matches for multiplayer compatibility.
Before You Begin
Before you start, make sure you have:
- An active RocketNode Satisfactory server
- Your SFTP credentials (username, password, IP, and port)
- Your server stopped in the RocketNode panel
- Satisfactory Mod Manager (SMM) installed on your PC (Download from ficsit.app)
Step-by-Step Setup
Step 1: Stop Your Server
Log into panel.rocketnode.com and stop your Satisfactory server. This is required to avoid file conflicts during mod installation.
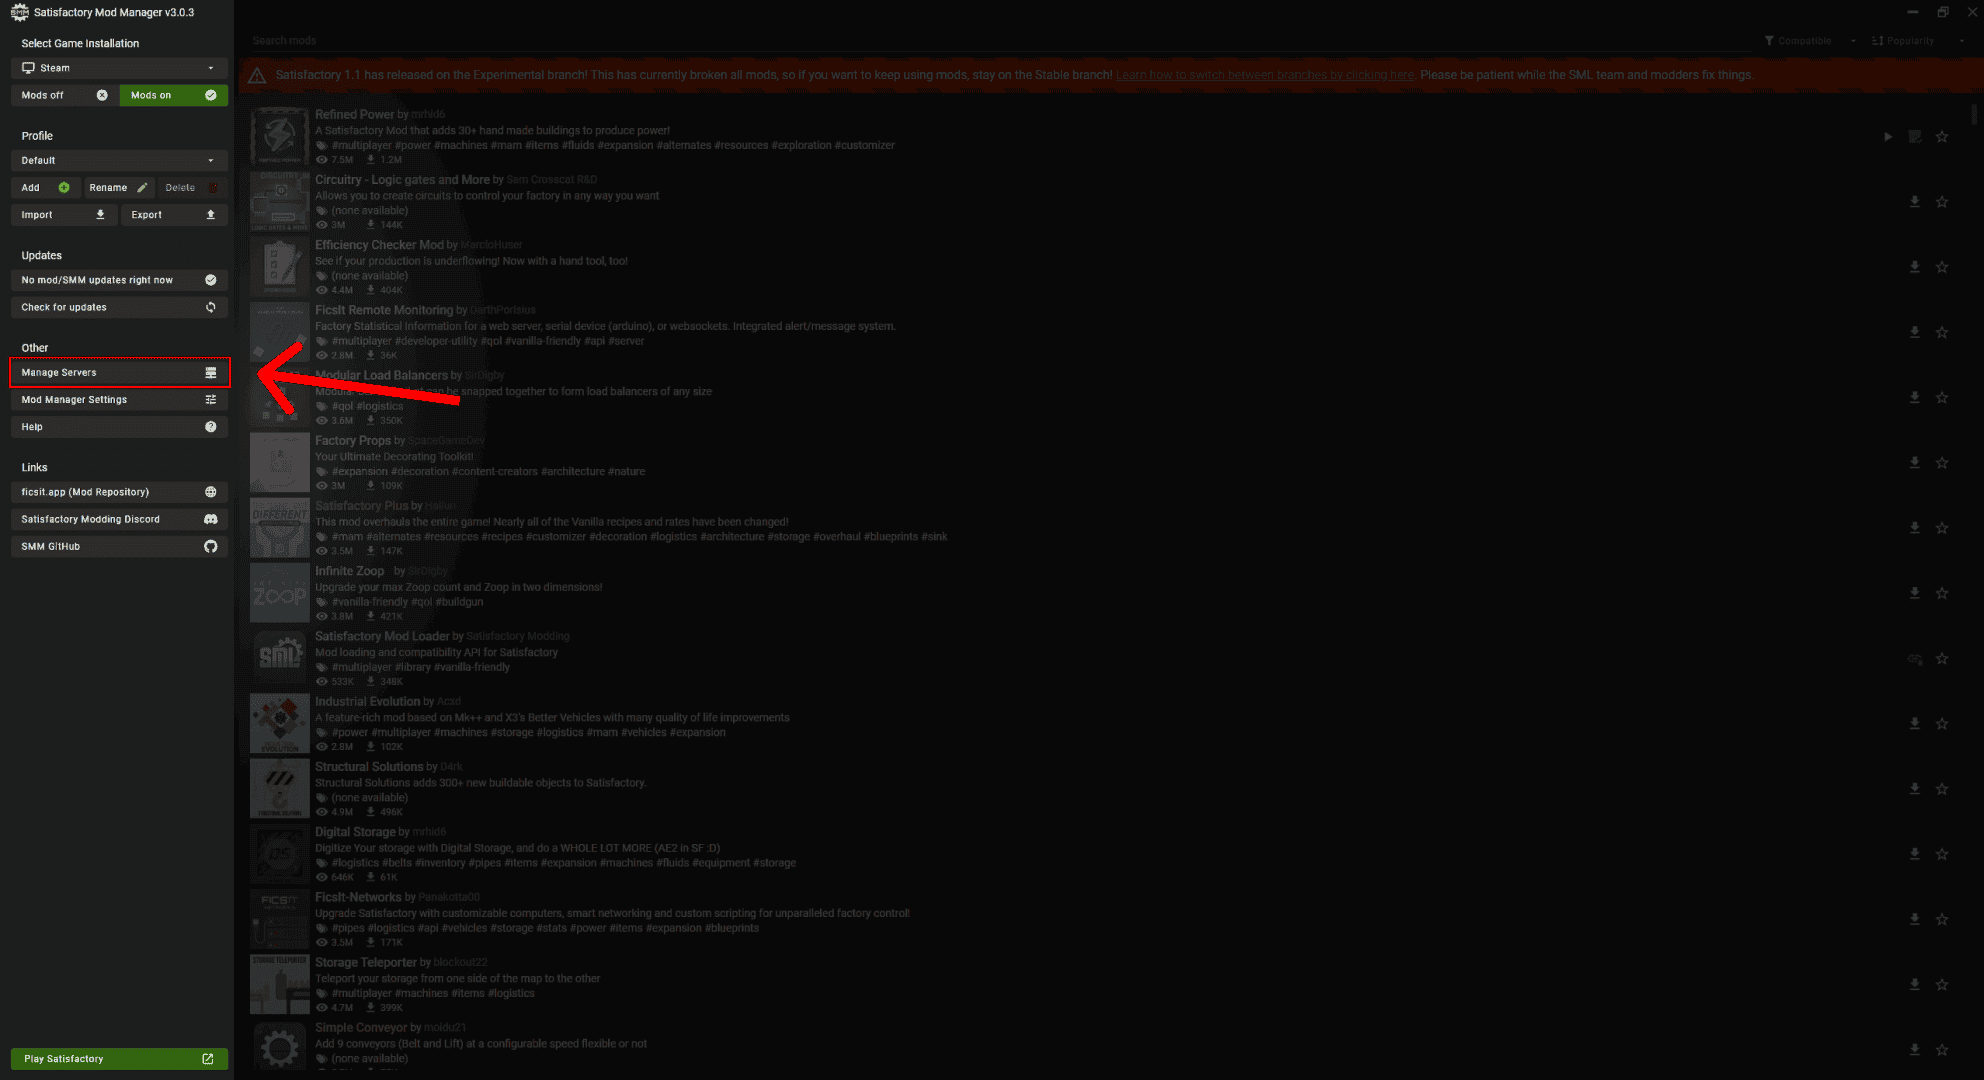
Step 2: Open Satisfactory Mod Manager
Launch Satisfactory Mod Manager on your PC.
In the left-hand menu, select Manage Servers.
Step 3: Retrieve Your SFTP Details from the RocketNode Panel
- In your RocketNode panel, click on the Settings tab in the top menu
- Under General, you will see your SFTP Connection Details including:
- Username
- Address (with port included)
These values are required to connect your server to SMM.
Example:
Username: lteodorvzy.4192b609
Address: sftp://wings-dev.va.rocketnode.net:2022

Step 4: Add Your Server in Advanced Mode
- In SMM, select SFTP, instead of FTP and click Switch to advanced mode
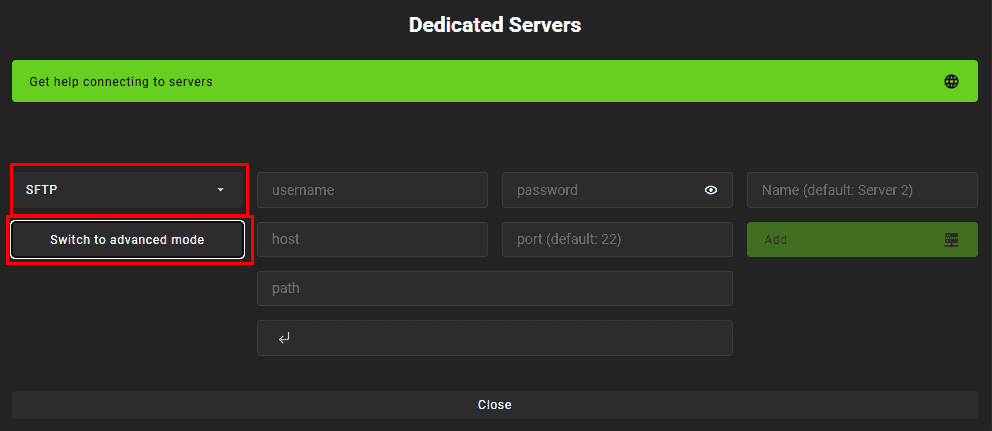
- Enter your server information in the following format:
username:password@host:port/
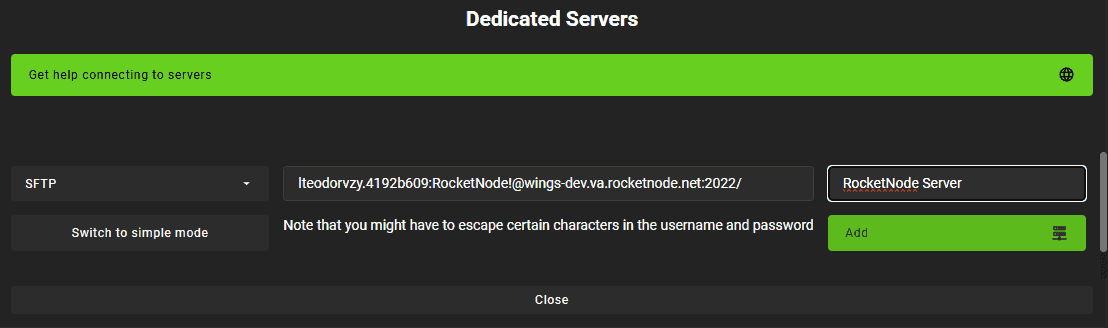
Example:
lteodorvzy.4192b609:[email protected]:2022/
NOTE: If your password includes special characters like !, they usually work without issues. If needed, use escaped versions (for example, ! as %21).
Set the path to /, give the server a name and click Add.
Your server should now appear in the list with a version tag like LinuxServer.
Step 5: Install Mods on the Server
- Select your server from the Game Version dropdown
- Use the Compatible filter to view only server-supported mods
- Click Install next to the mods you want to use
- Click Apply Changes to install the mods to your server
Step 6: Match Mods on Your Local Game
- Switch the dropdown to your local game installation (Steam or Epic)
- Ensure the same mods are selected
- If needed, install them manually or click Use same profile
- Click Apply Changes to sync your client with the server
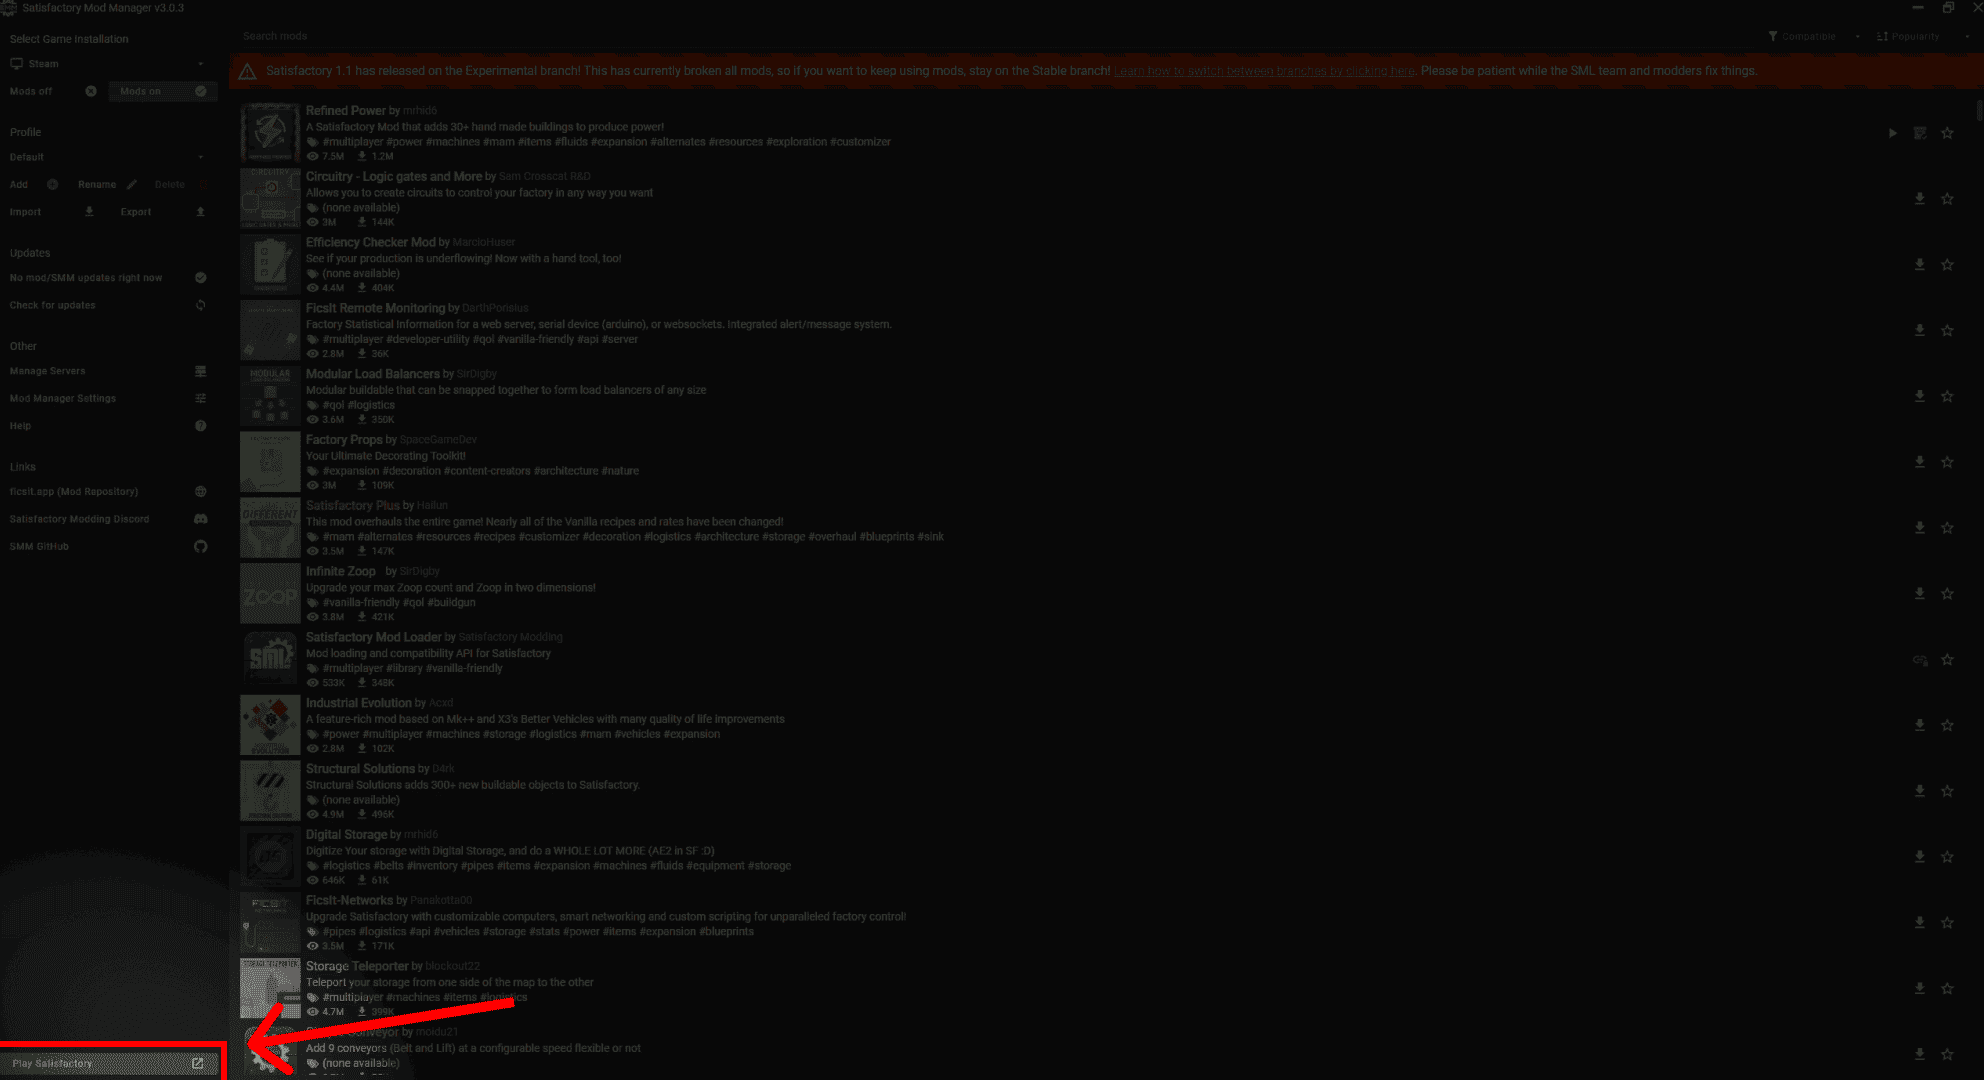
Step 7: Launch the Game Through SMM
Click Play Satisfactory in the bottom-left corner of SMM.
Launching the game this way ensures the mod loader is initialized correctly.
Do not launch the game directly through Steam or Epic.
Step 8: Start the Server
Return to your RocketNode panel and start your server.
The first launch after installing mods may take longer than usual as the mods are loaded.
Step 9: Join and Play
Launch the game through SMM and join your server.
If your client and server have matching mod versions, the connection should be smooth and error-free.
Troubleshooting Tips
- Mod mismatch: Confirm both server and client have the same mod versions
- Connection issues: Try launching with no mods first to confirm base connectivity
- Sharing your setup: Export your mod profile from SMM to help friends sync their mods with yours
For further assistance, you can always reach out to RocketNode’s 24/7 support team or browse our Satisfactory Helpdesk for more server management guides.
